
HawkeAI User Guide
![]()
Resources
Shopify Integration
Part 1 Steps
Welcome to the Hawke AI and Shopify integration tutorial.
Go to admin.shopify.com
1. Introduction
In order to integrate Shopify into a Hawk AI account, first navigate to your admin page on your Shopify account, then go to settings.
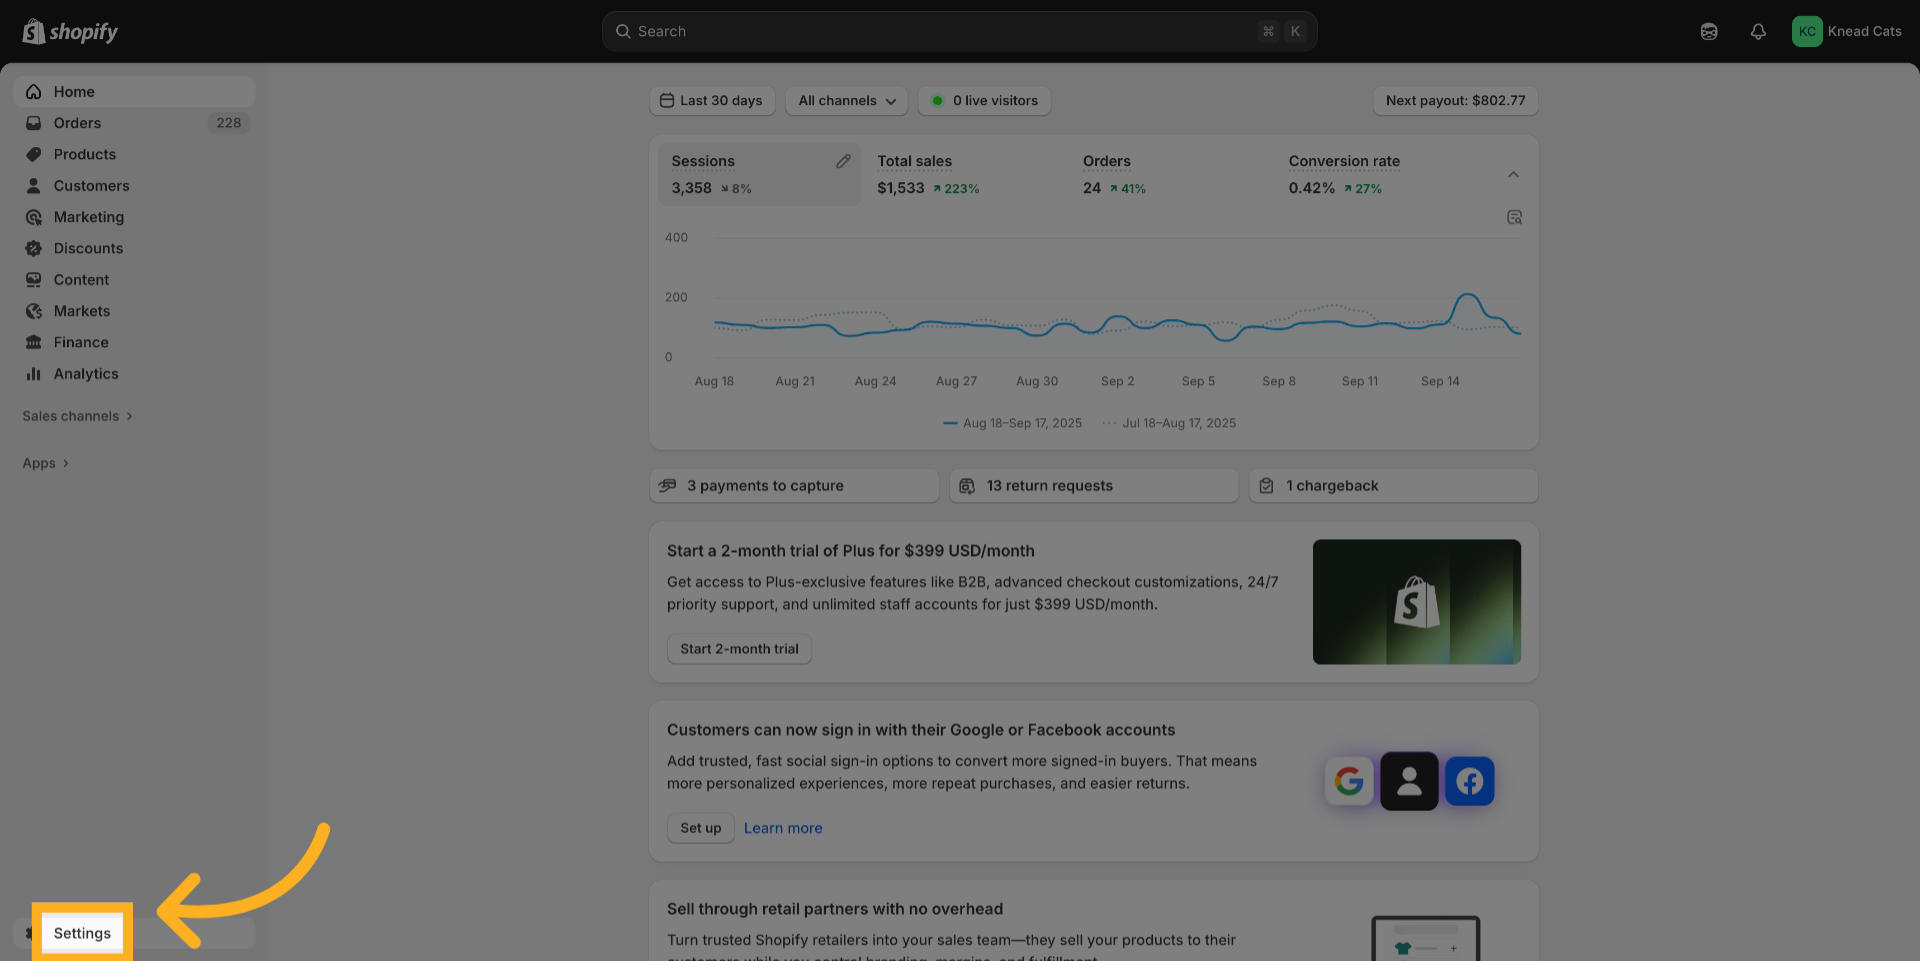
2. Click “Settings”
Click “Settings” to open your Shopify admin settings.
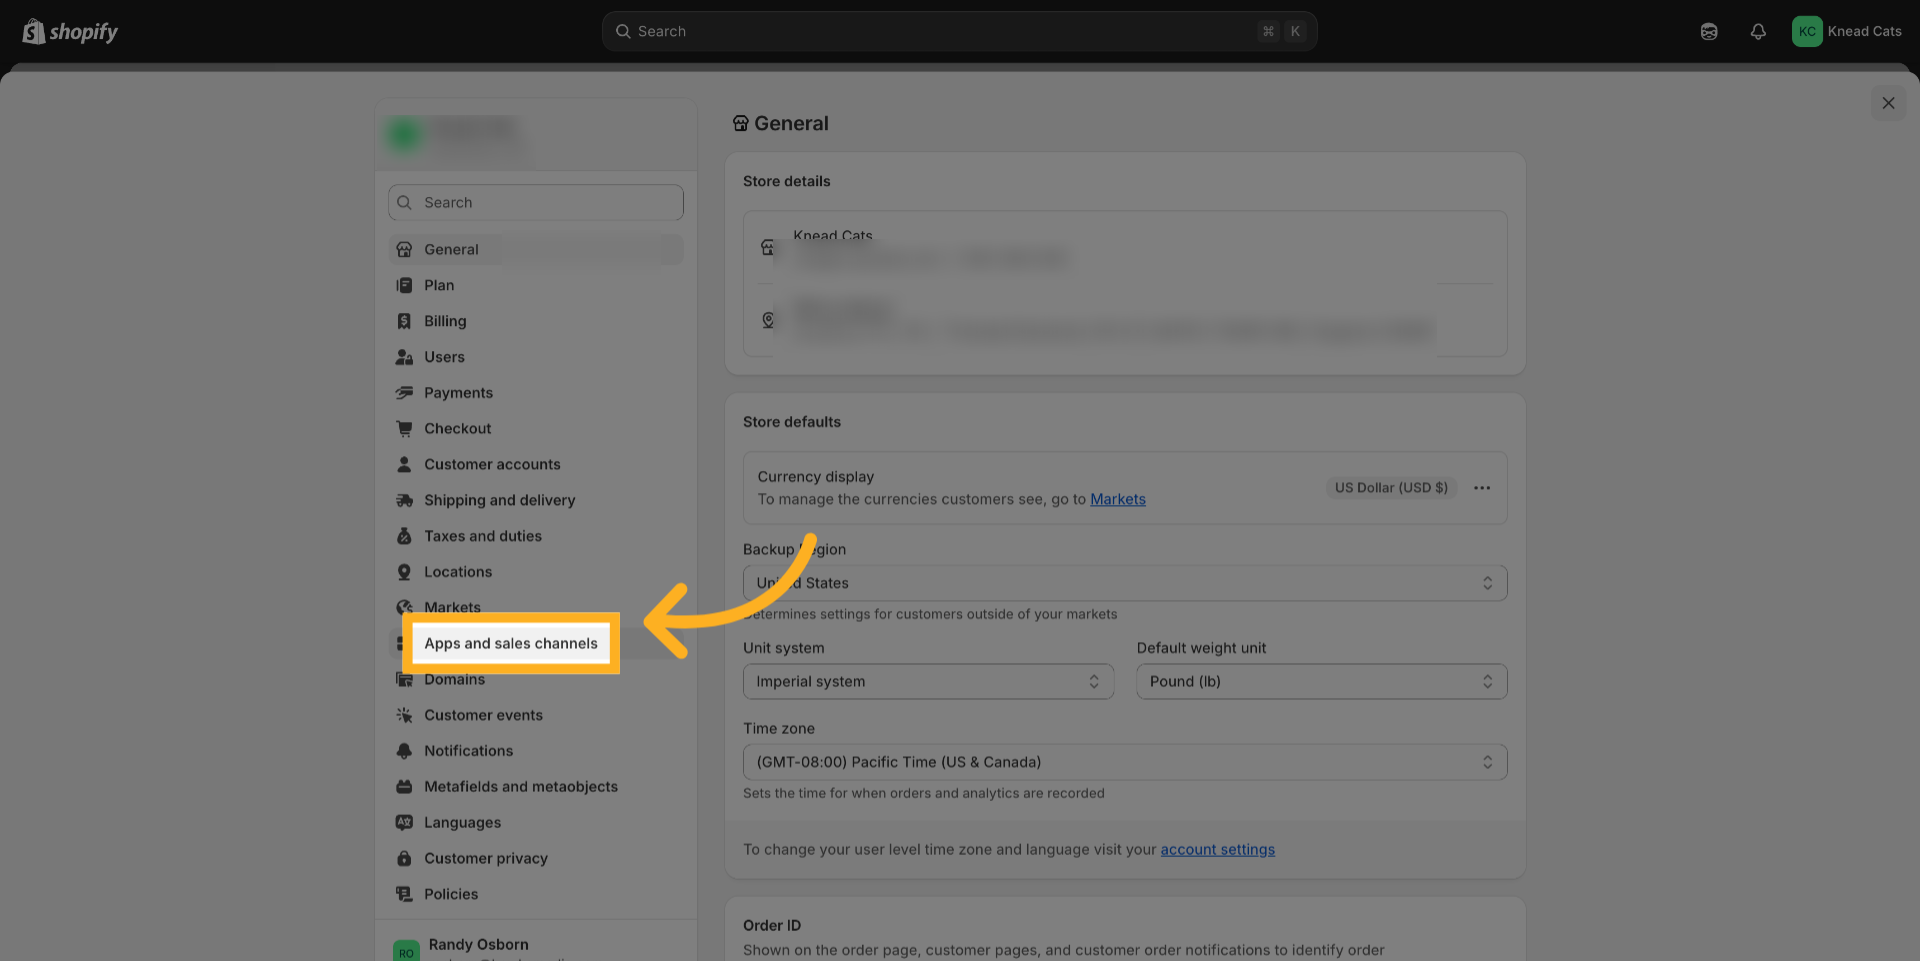
3. Click “Apps and sales channels”
Click “Apps and sales channels” to manage your installed apps and sales channels.
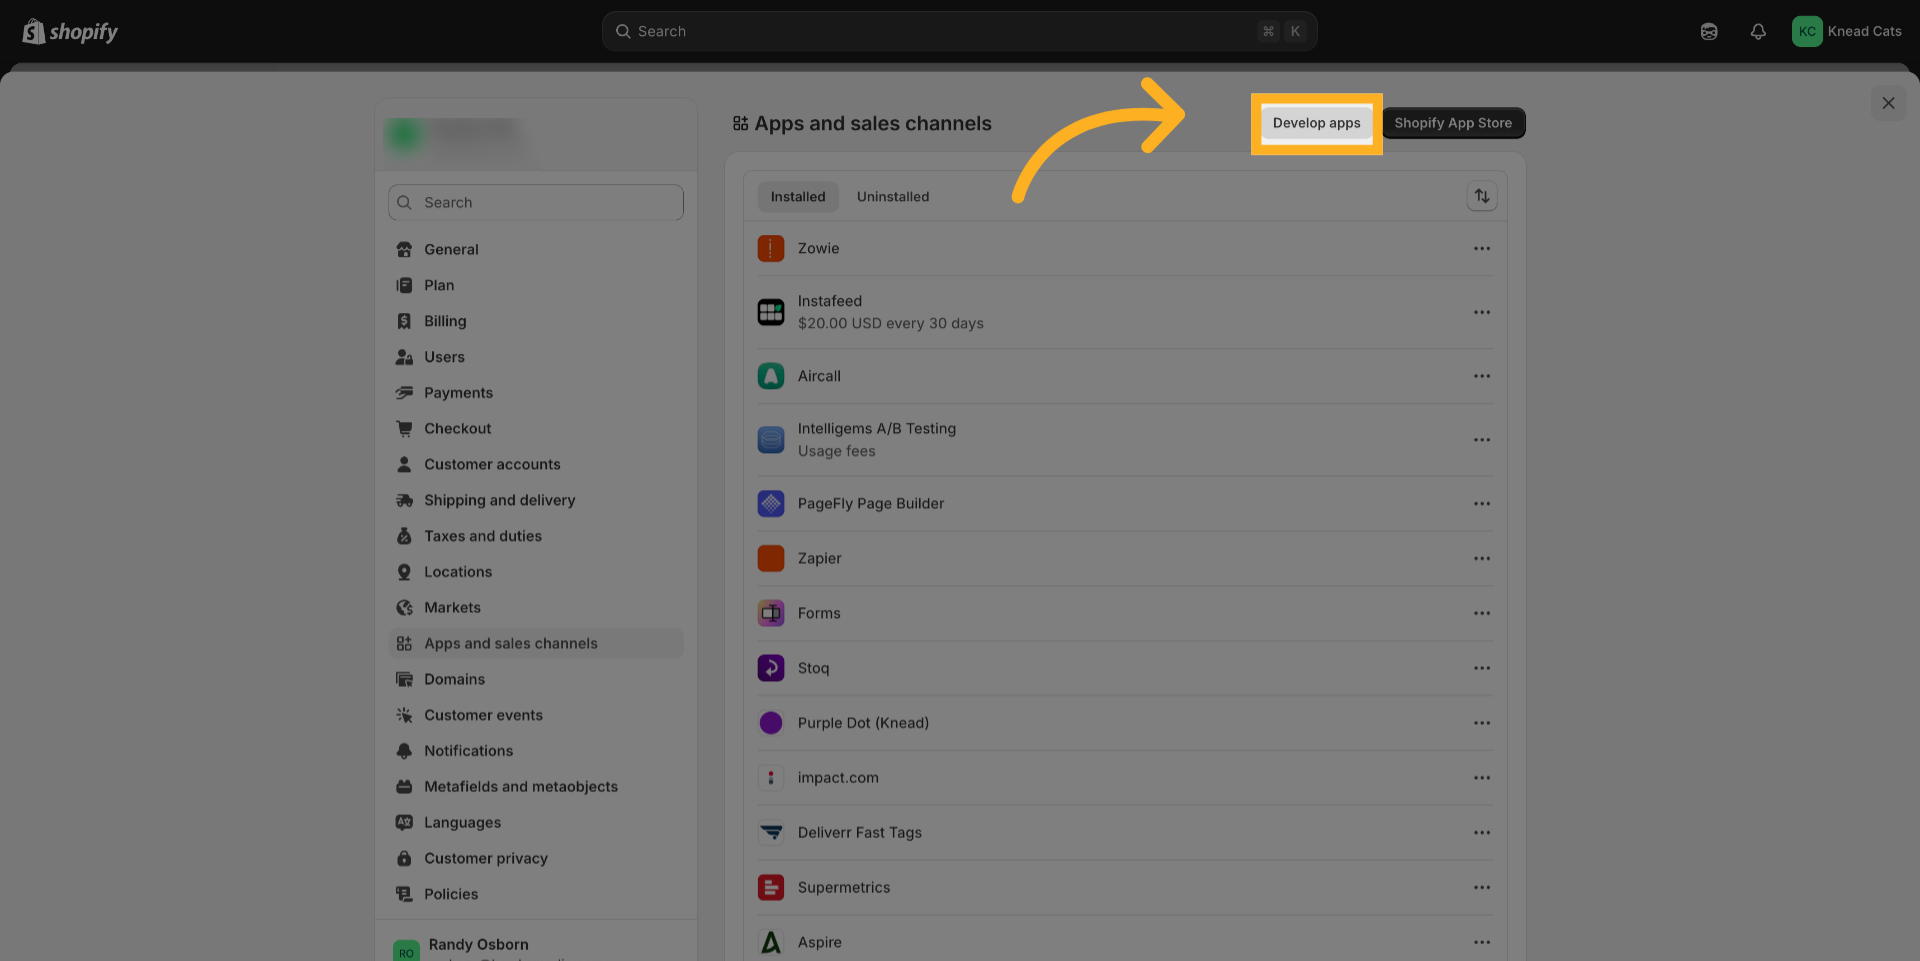
4. Click “Develop apps”
Click “Develop apps” to access the app development section.
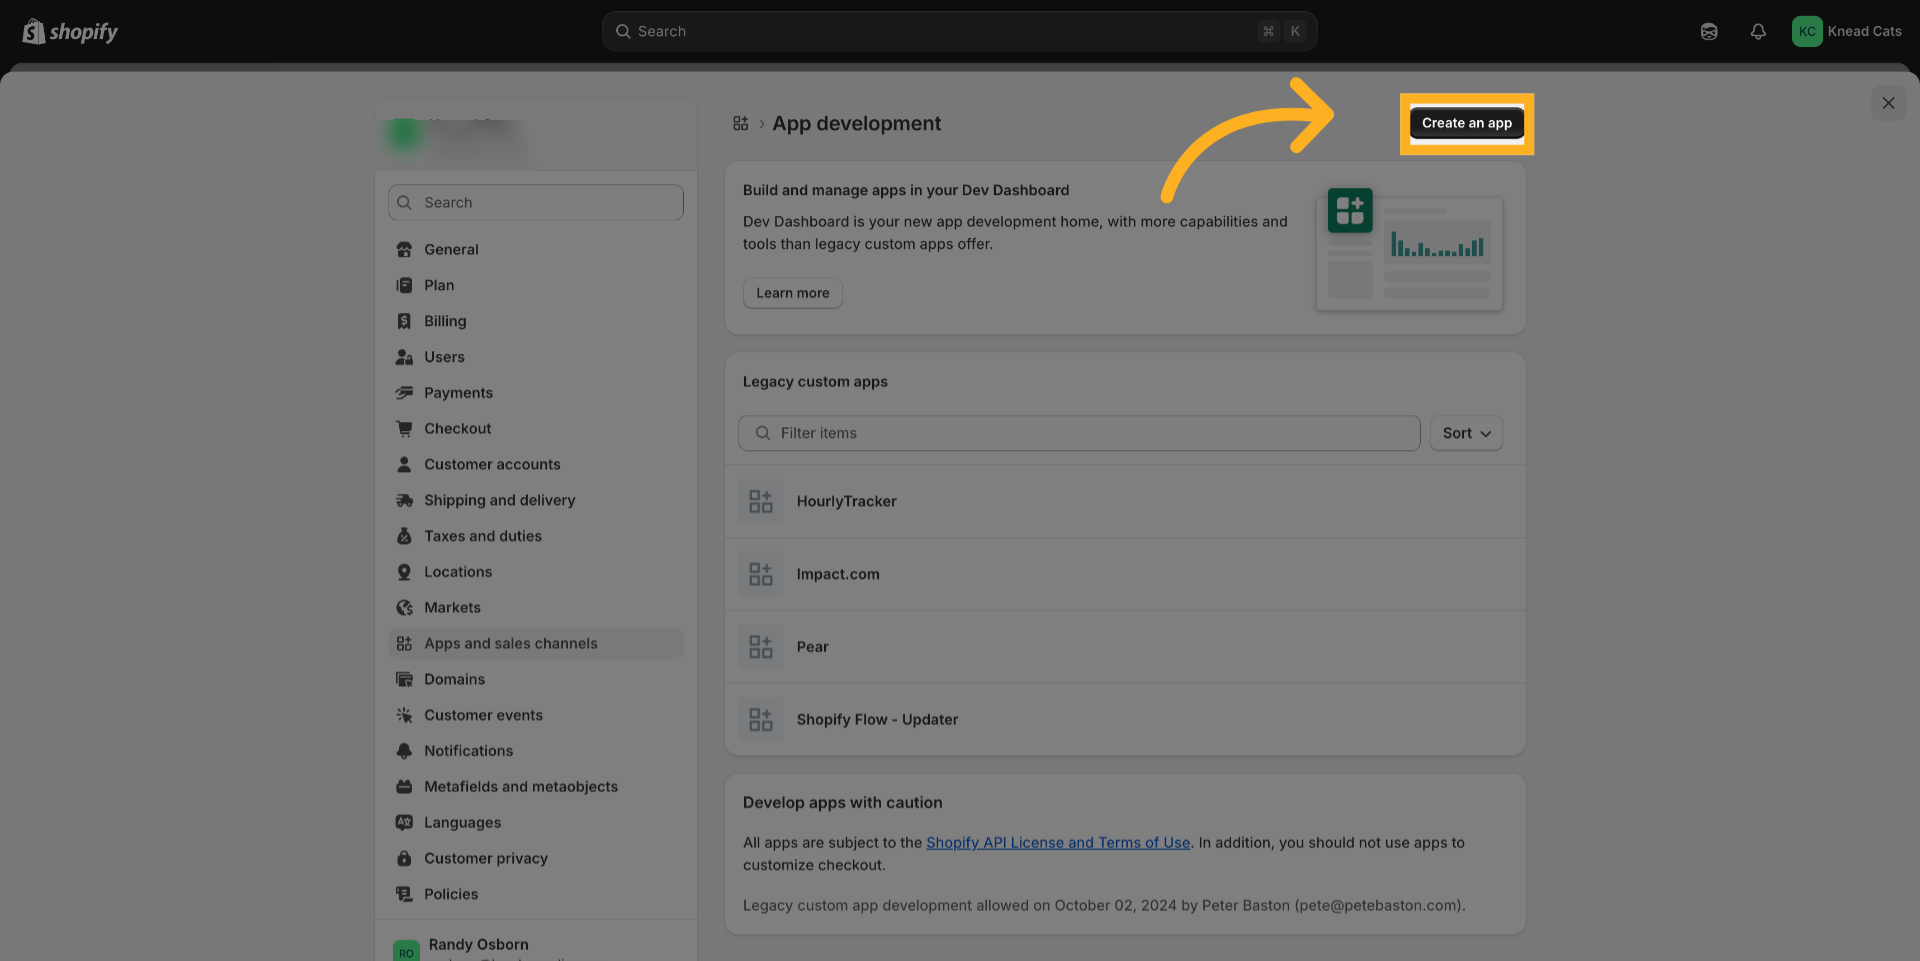
5. Click “Create an app”
Click “Create an app” to start creating a new app.
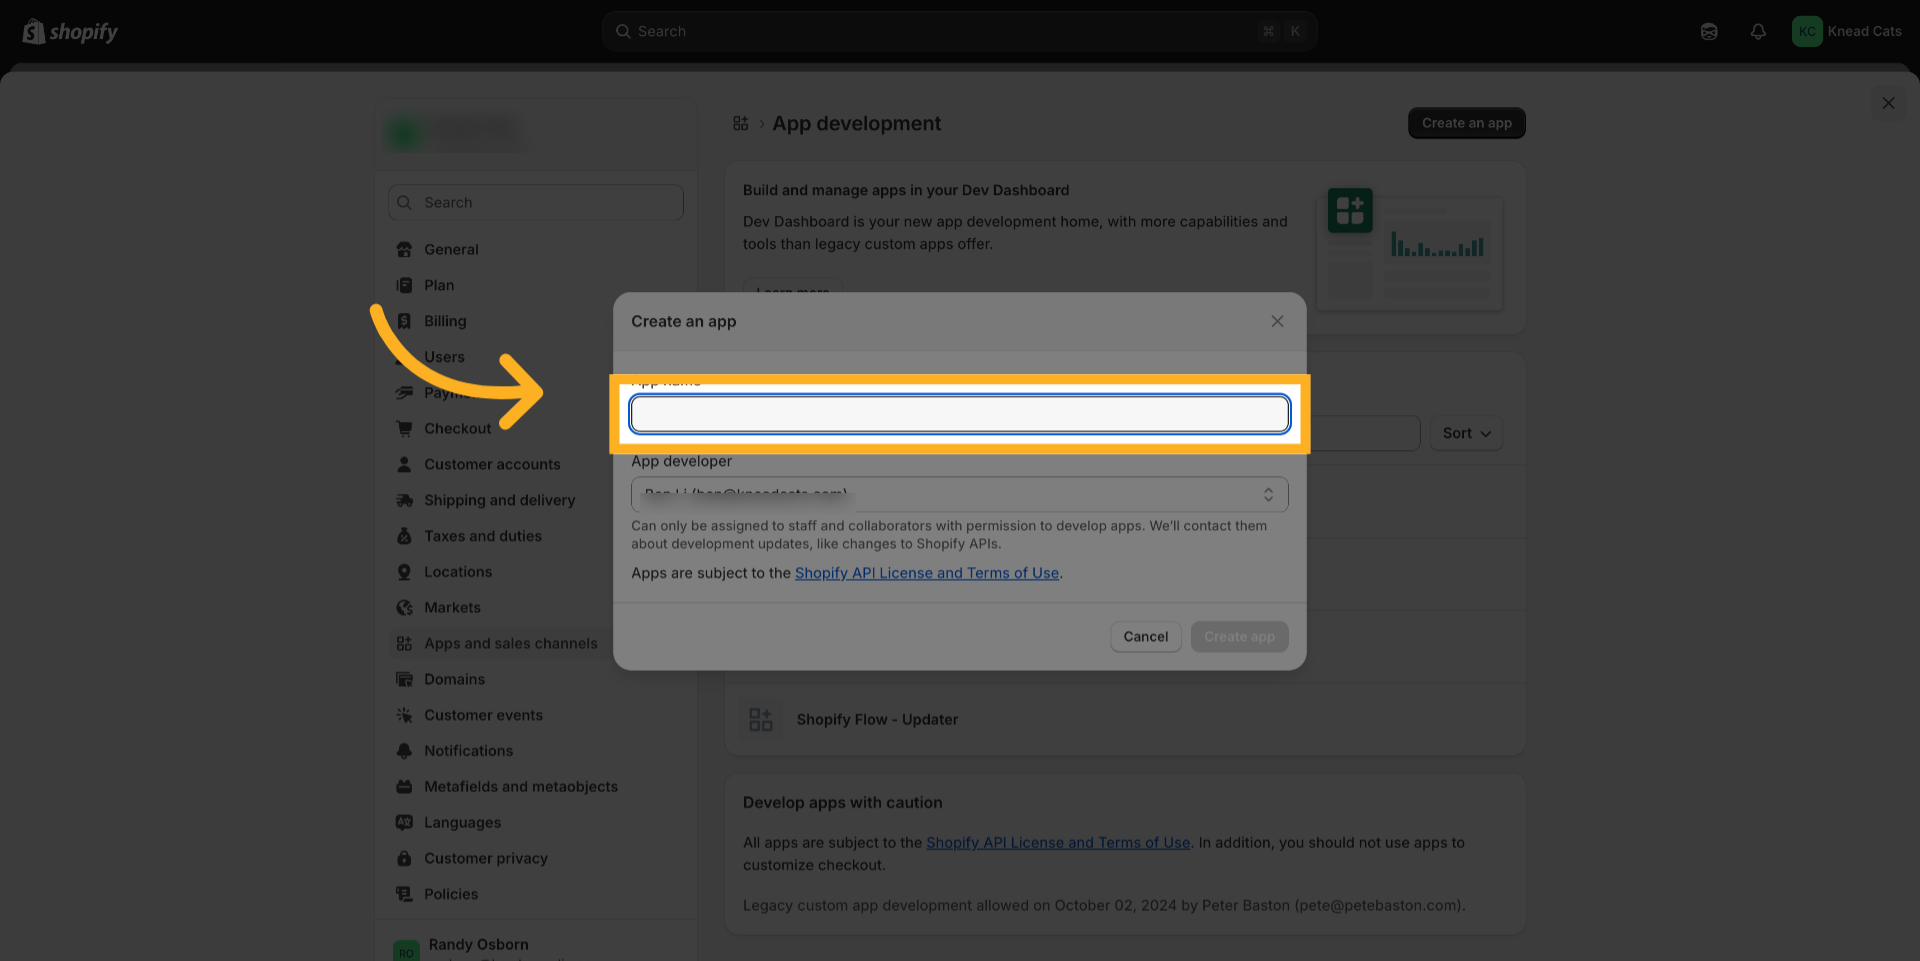
6. Click “App name”
Click “App name” to enter the name for your new app.
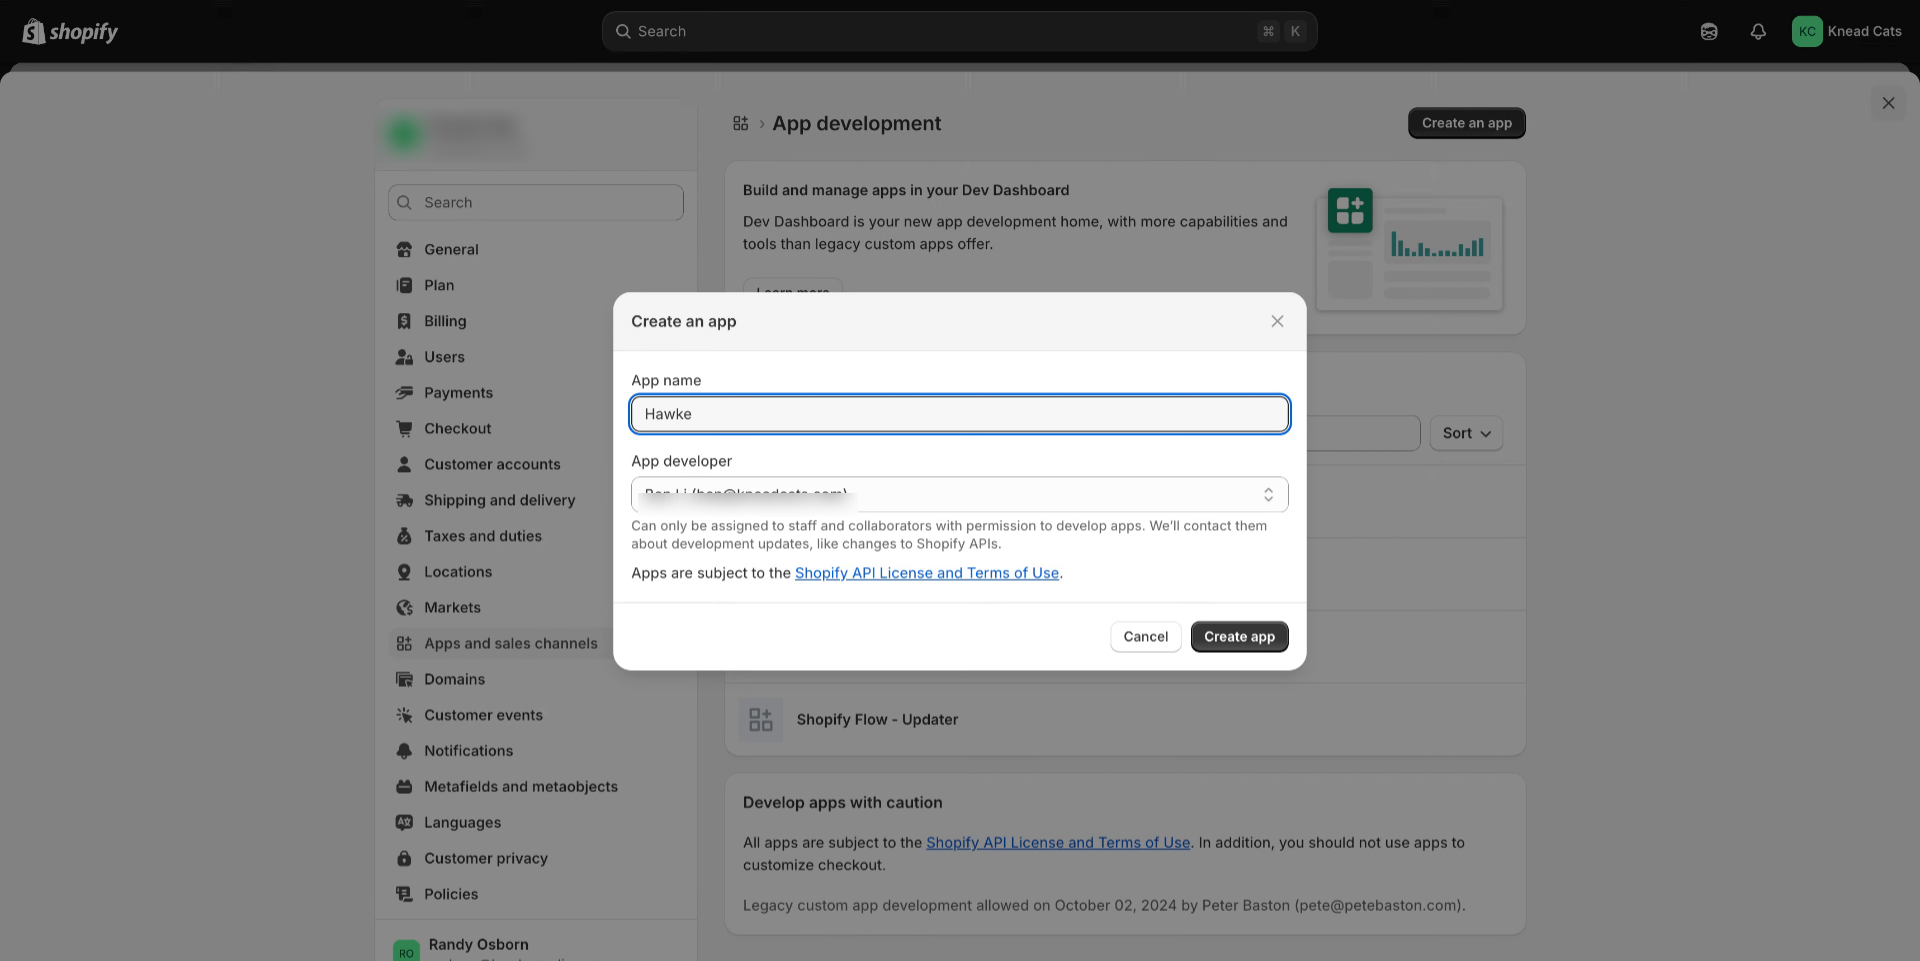
7. Fill “Hawke AI (read only)”
Enter “Hawke AI (read only)” as the app name. This indicates the app is for read-only access.
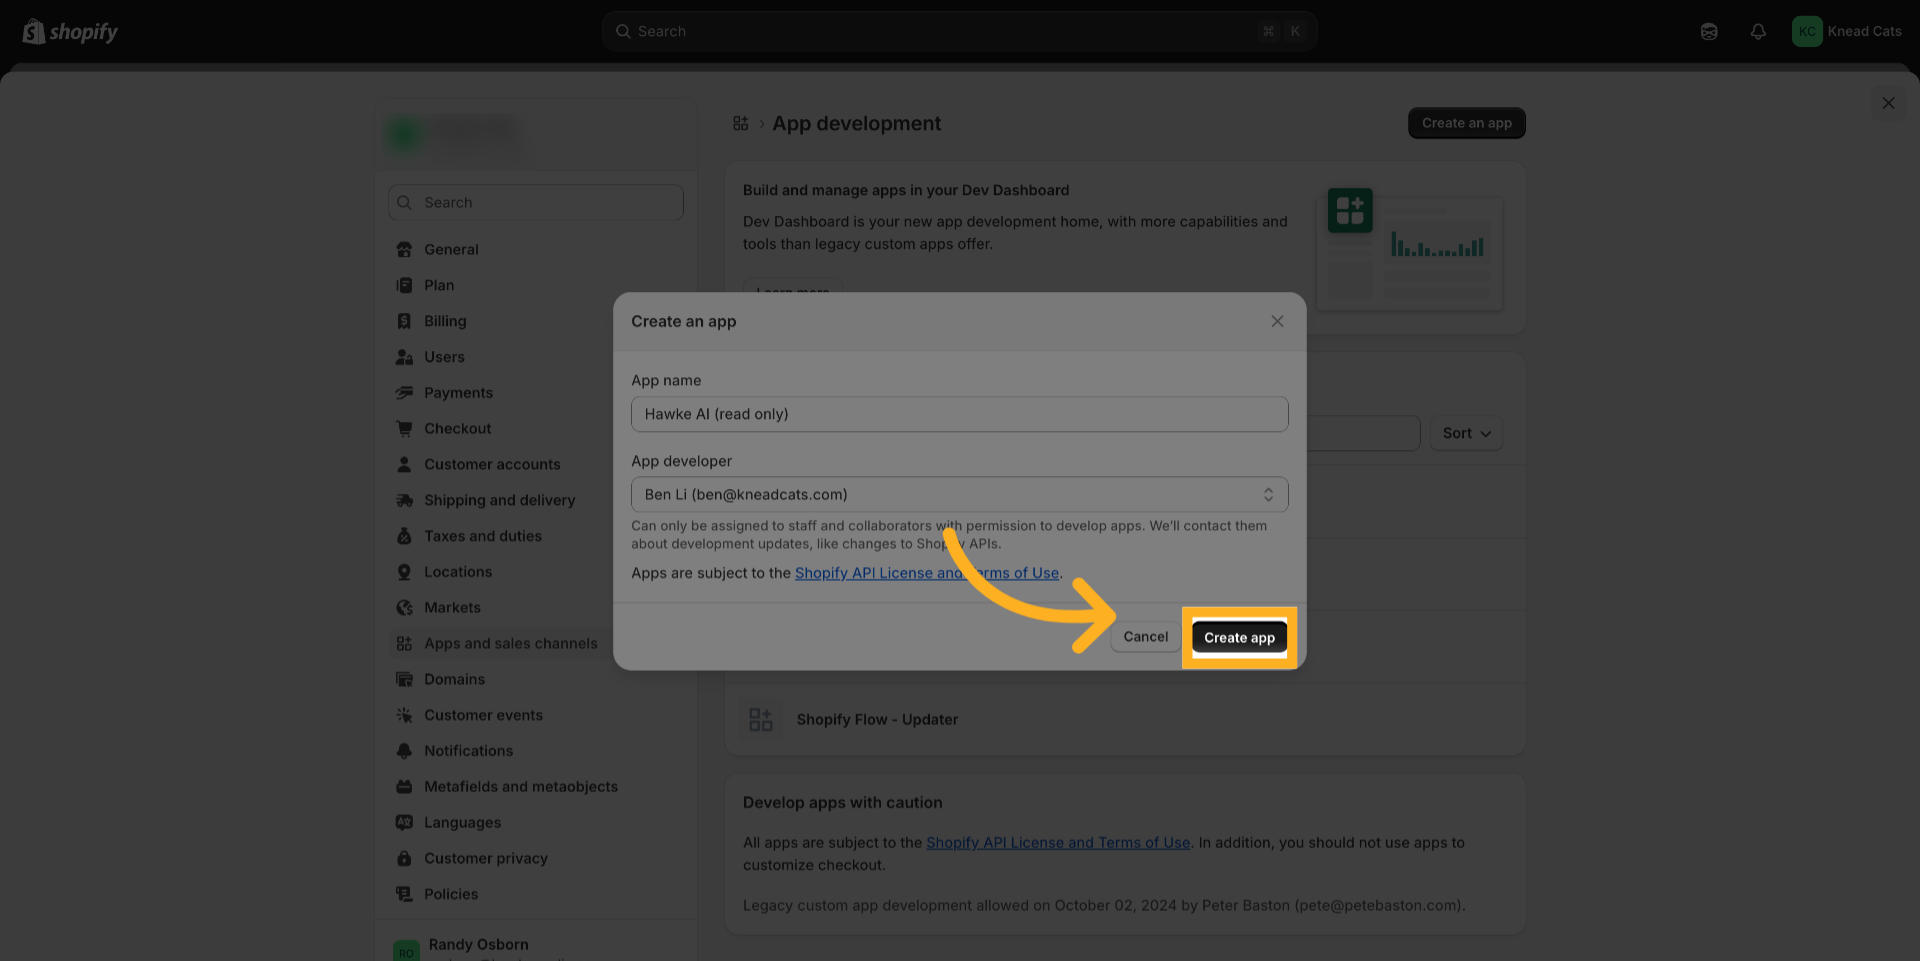
8. Click “Create app”
Now click “Create app” to create your new app with the specified name.
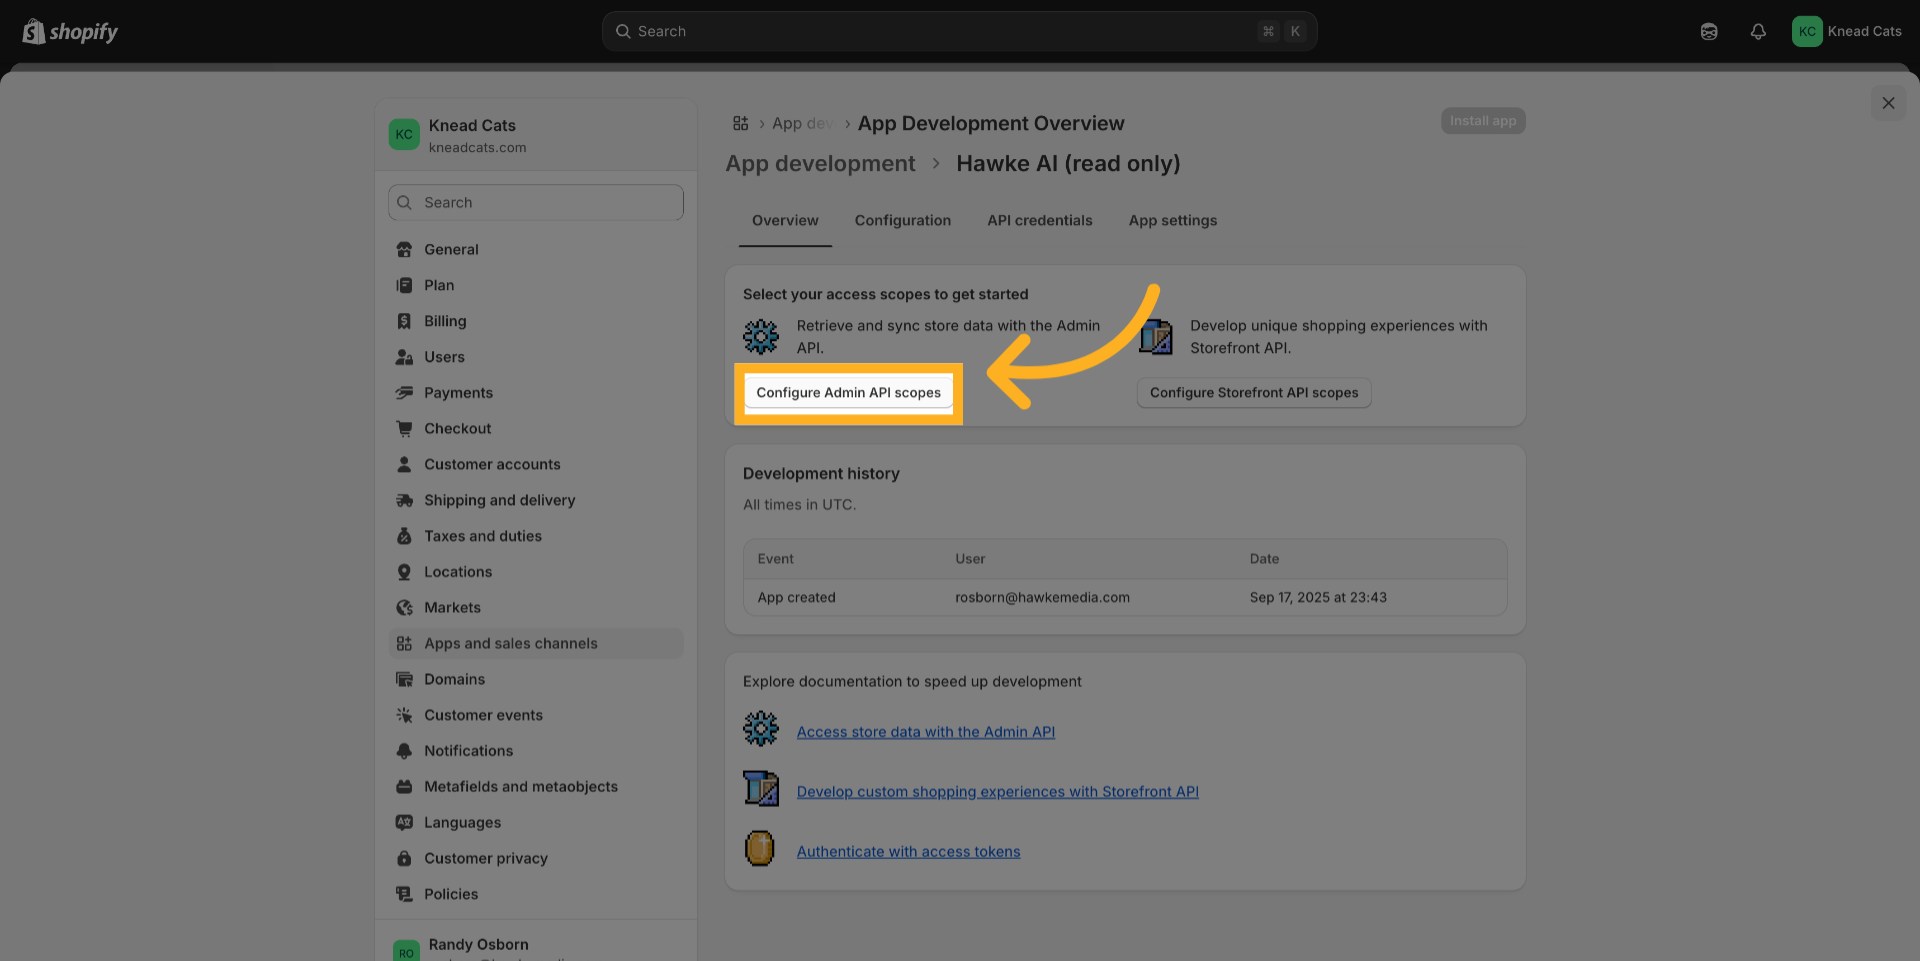
9. Click “Configure Admin API scopes”
Next, click “Configure Admin API scopes” to set the permissions for the app.
10. Click “read_analytics”
Click “read analytics” to select the permission to read analytics data.

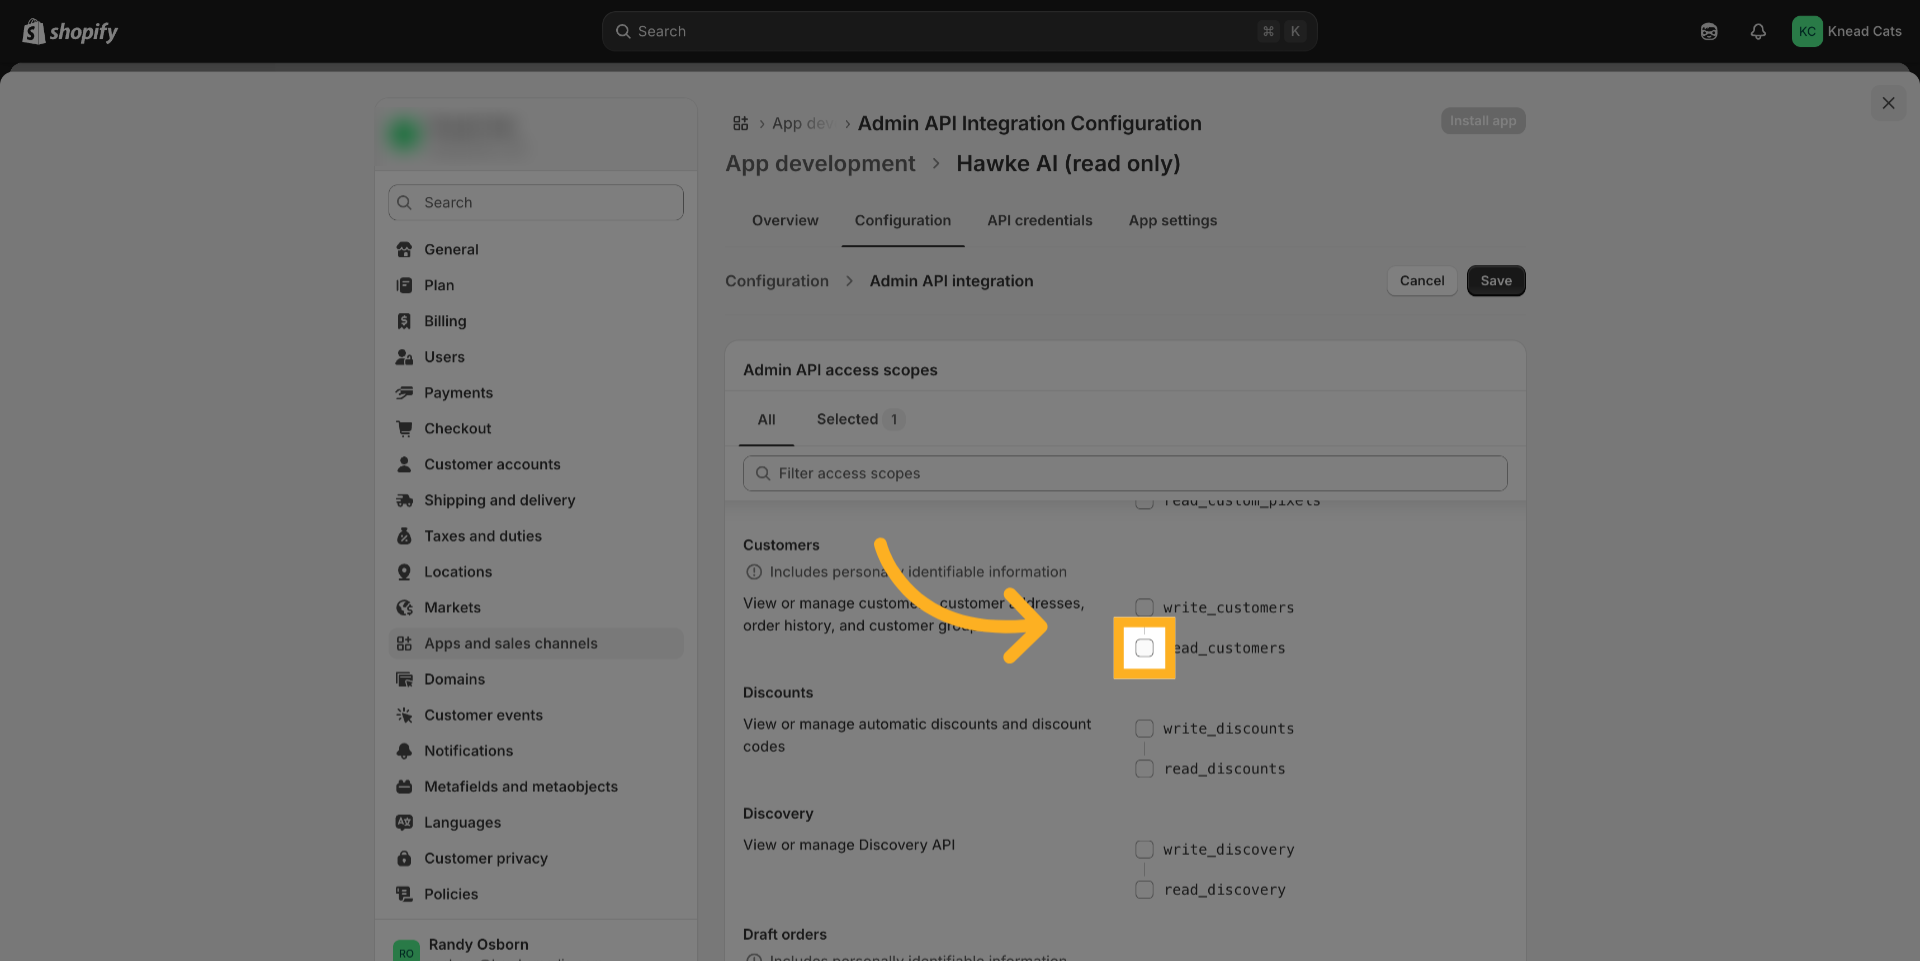
11. Click “read_customers”
Click “read customers” to select the permission to read customer data.
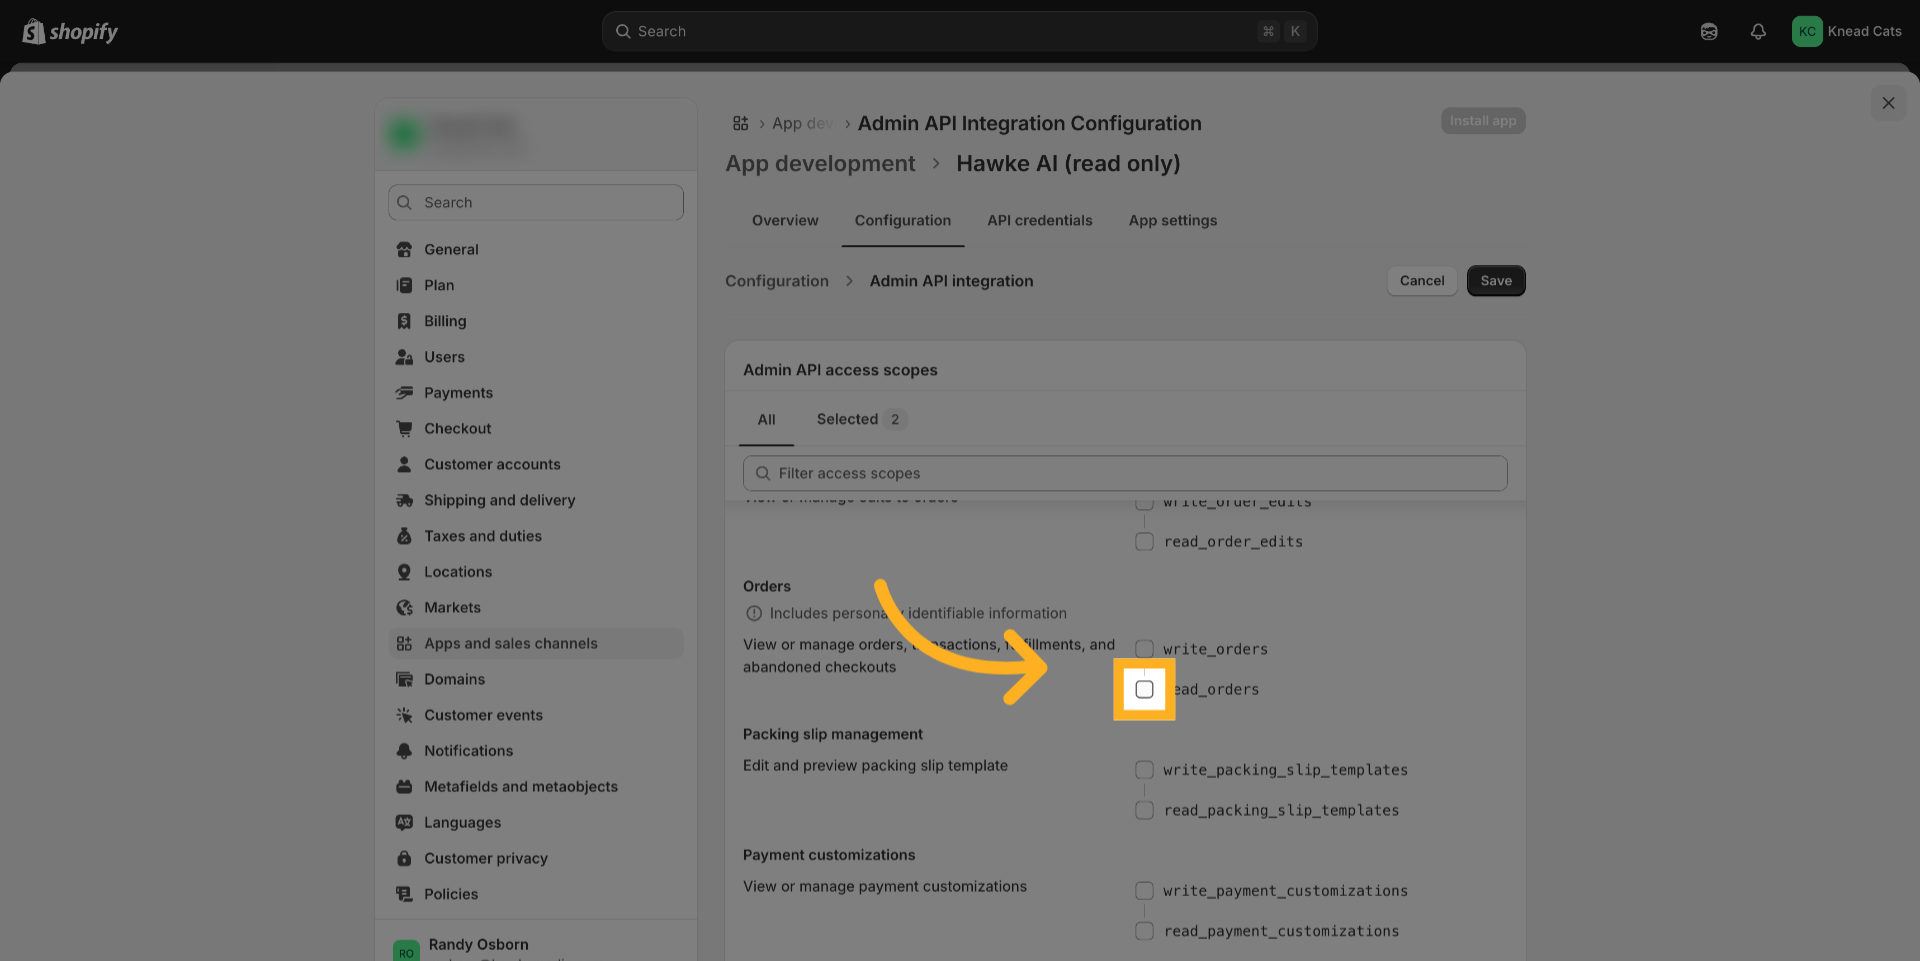
12. Click “read_orders”
Click “read orders” to select the permission to read order data.
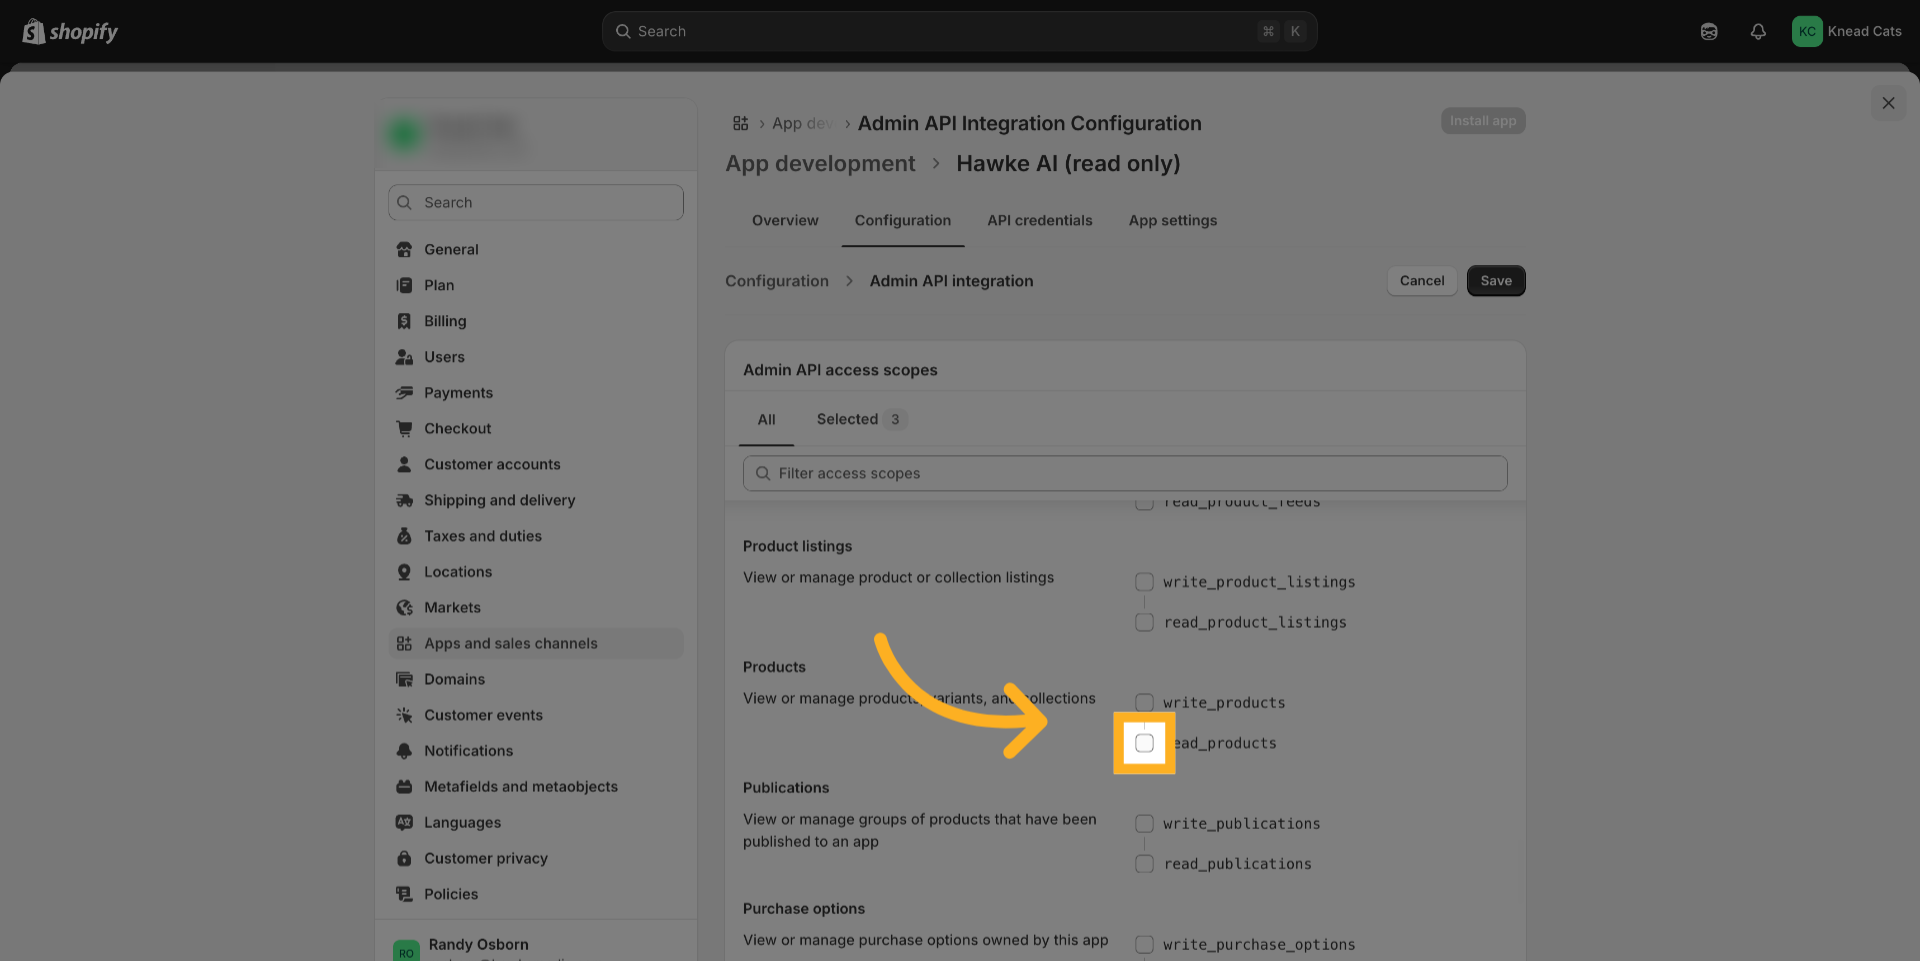
13. Click “read_products”
Click “read products” to select the permission to read product data.
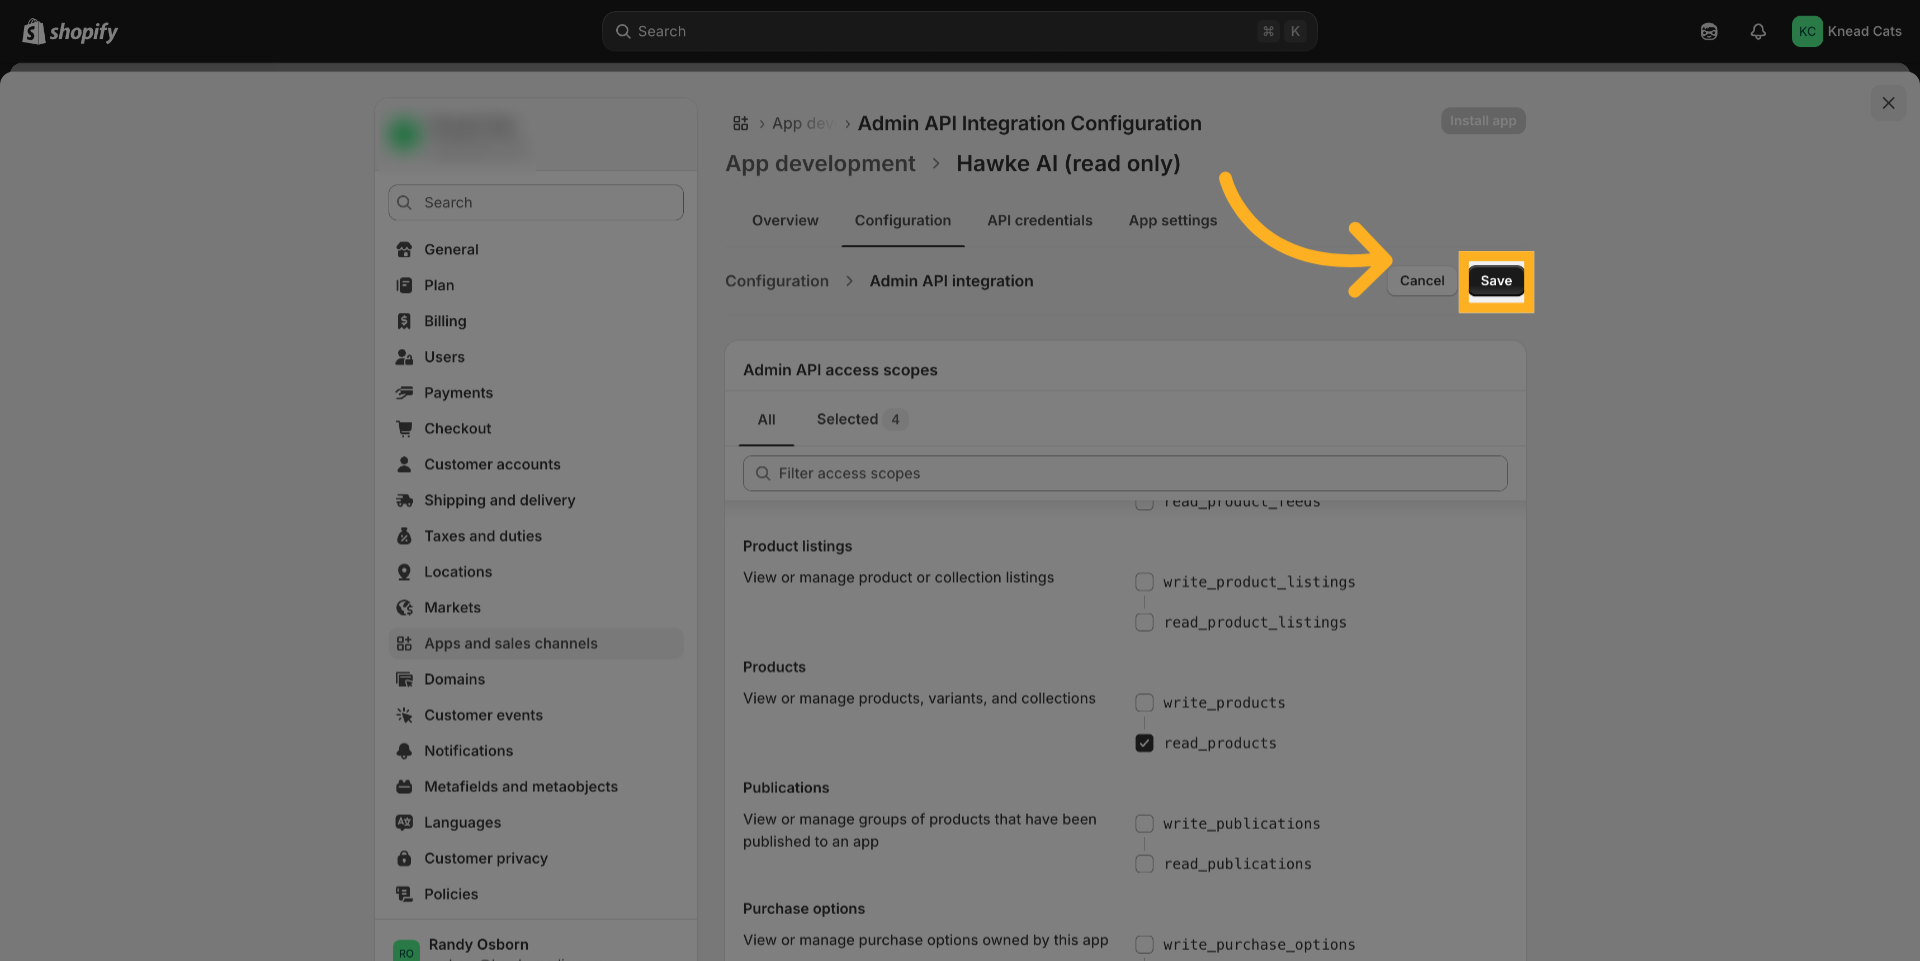
14. Click “Save”
Now click “Save” to save the configured API scopes.
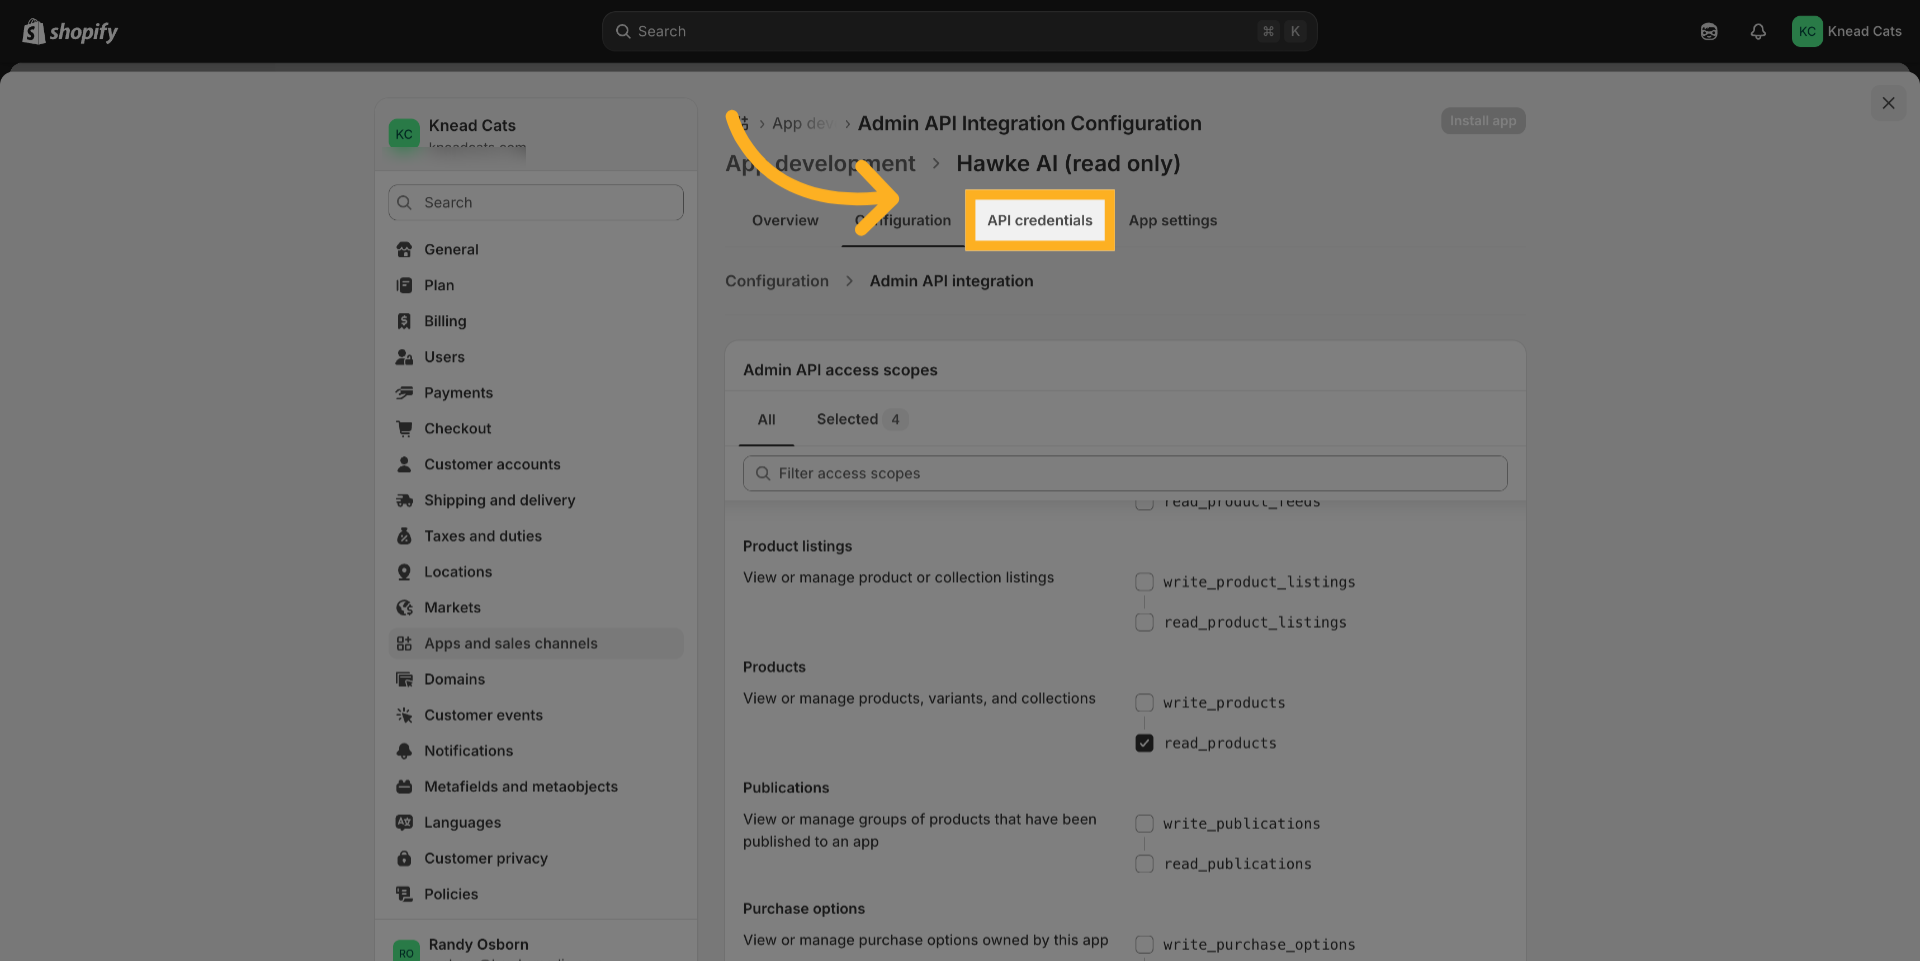
15. Click “API credentials”
Next click “API credentials” to view the app’s API credentials.
16. Click “Install app”
Click “Install app” to begin installing the app.

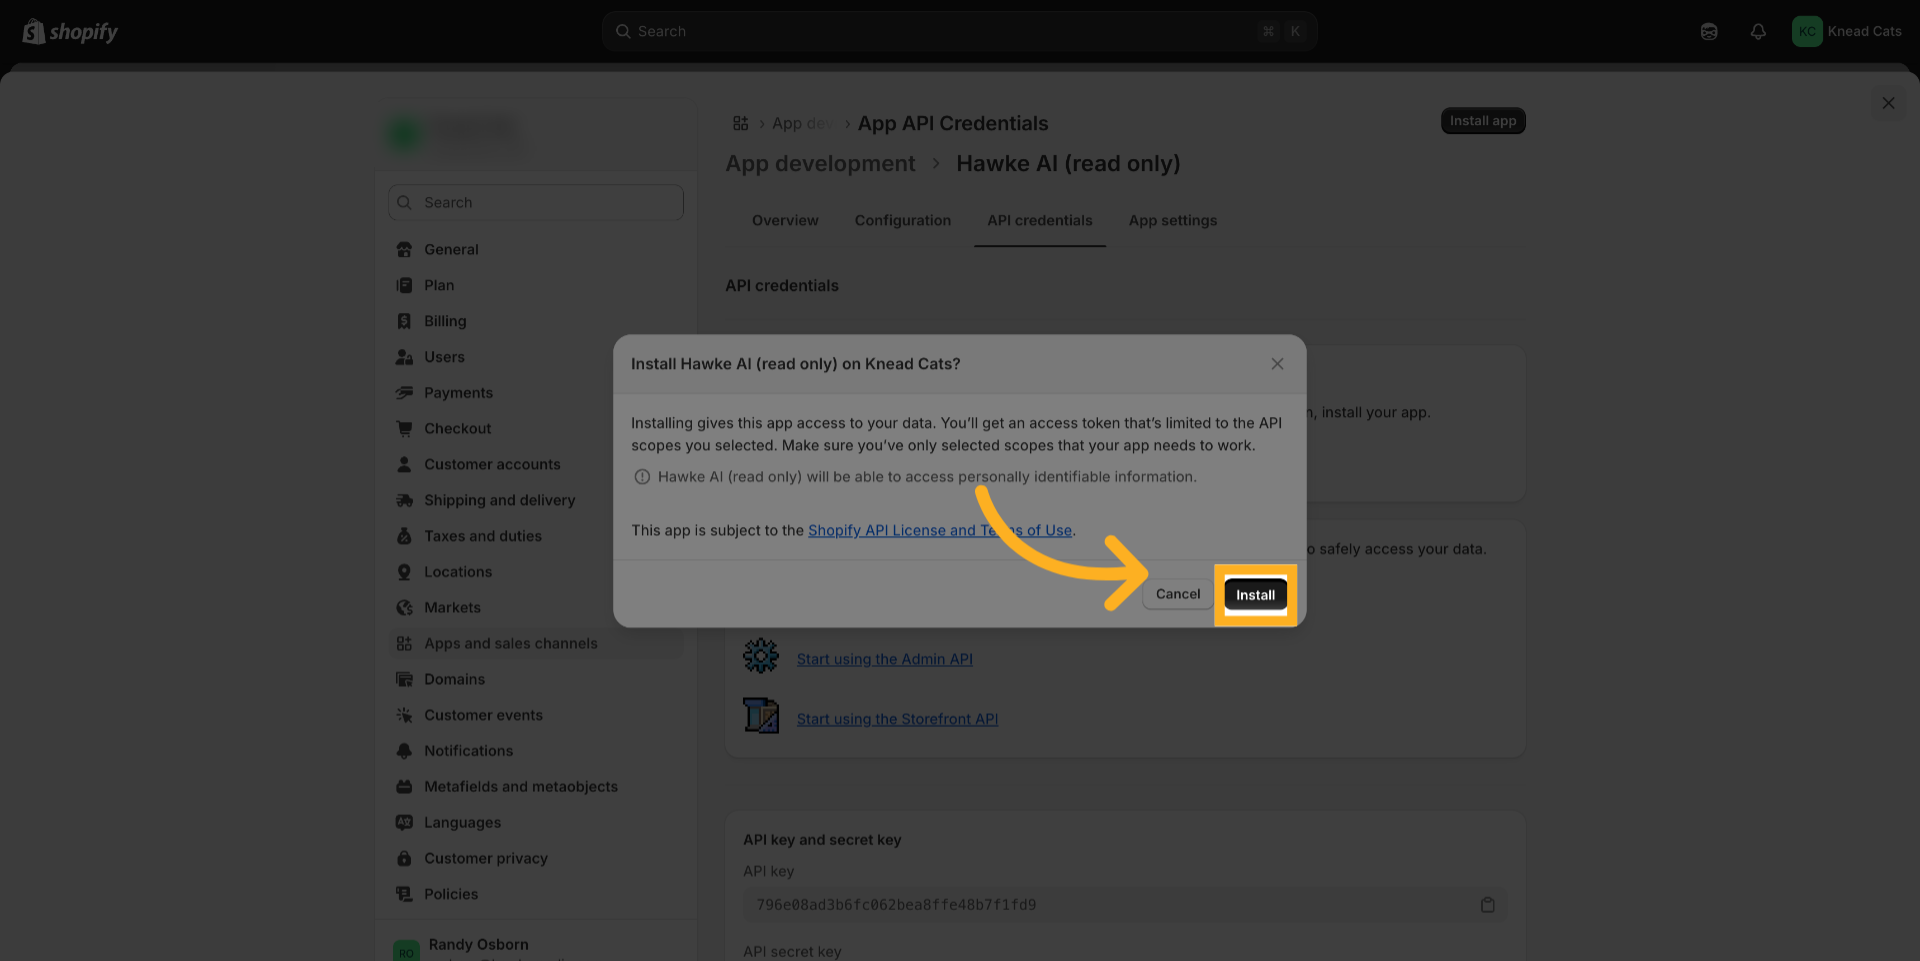
17. Click “Install”
Click “Install” to confirm the installation of the app.
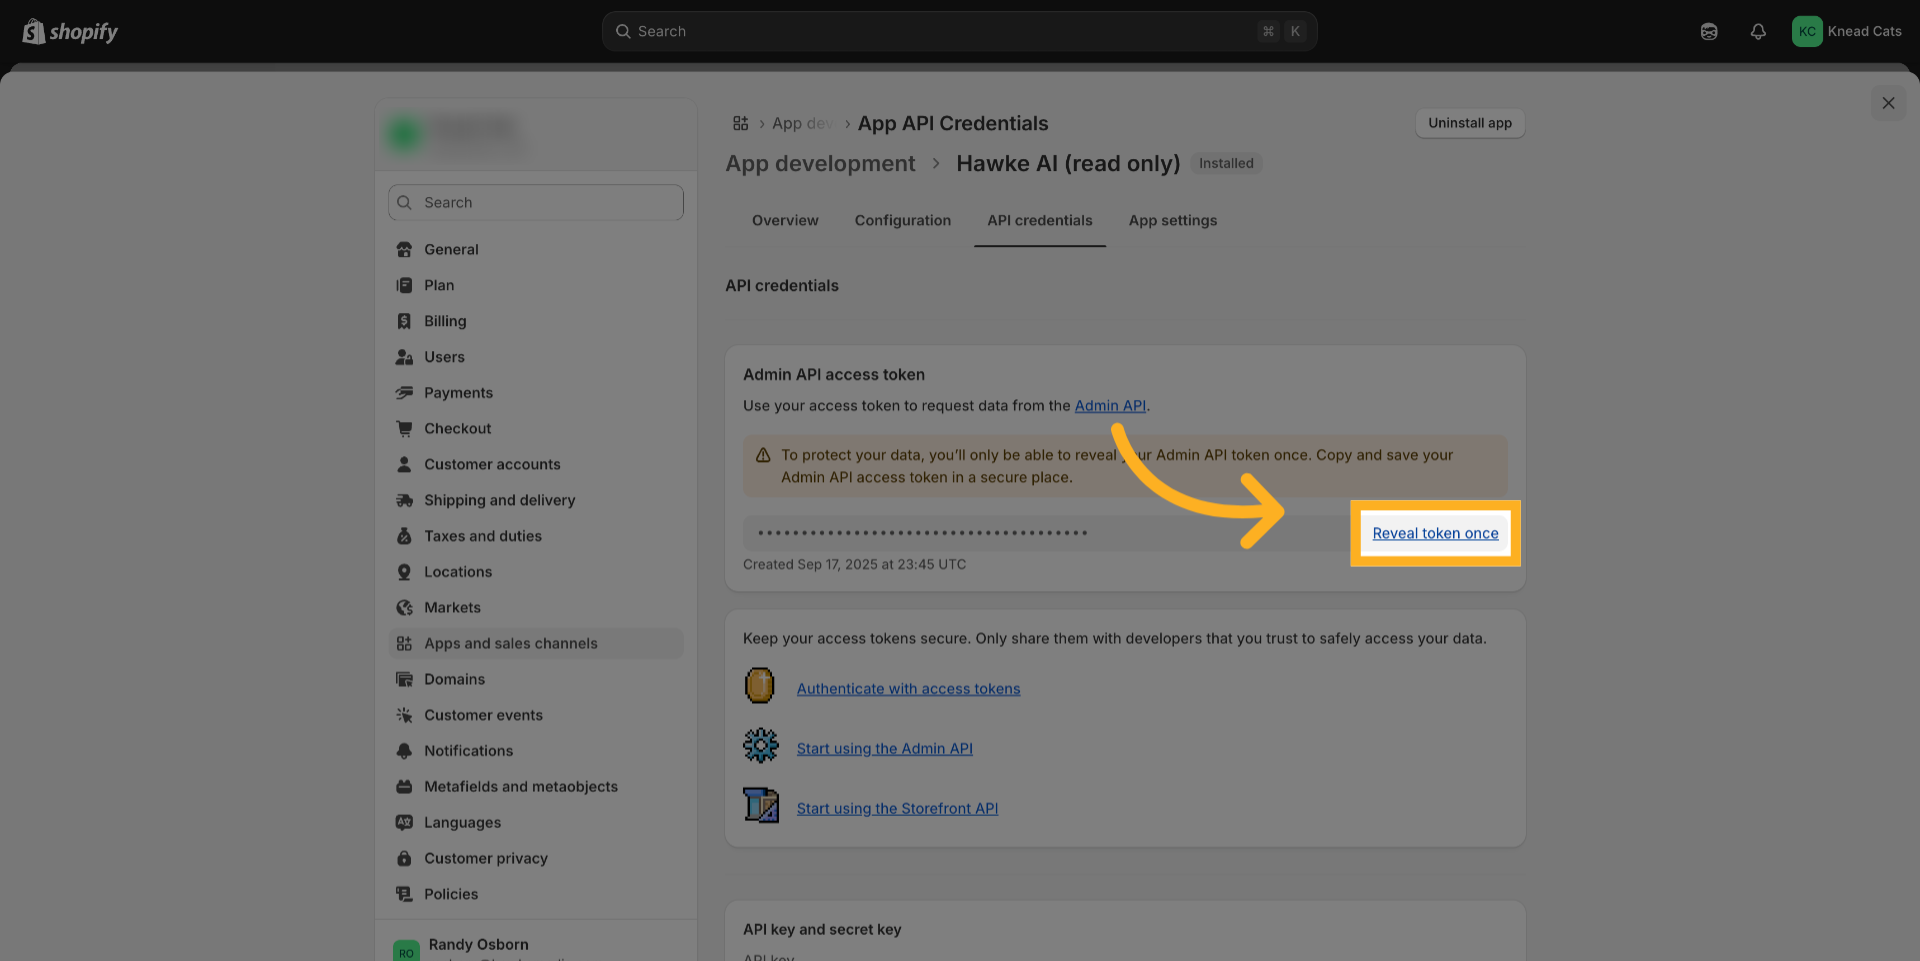
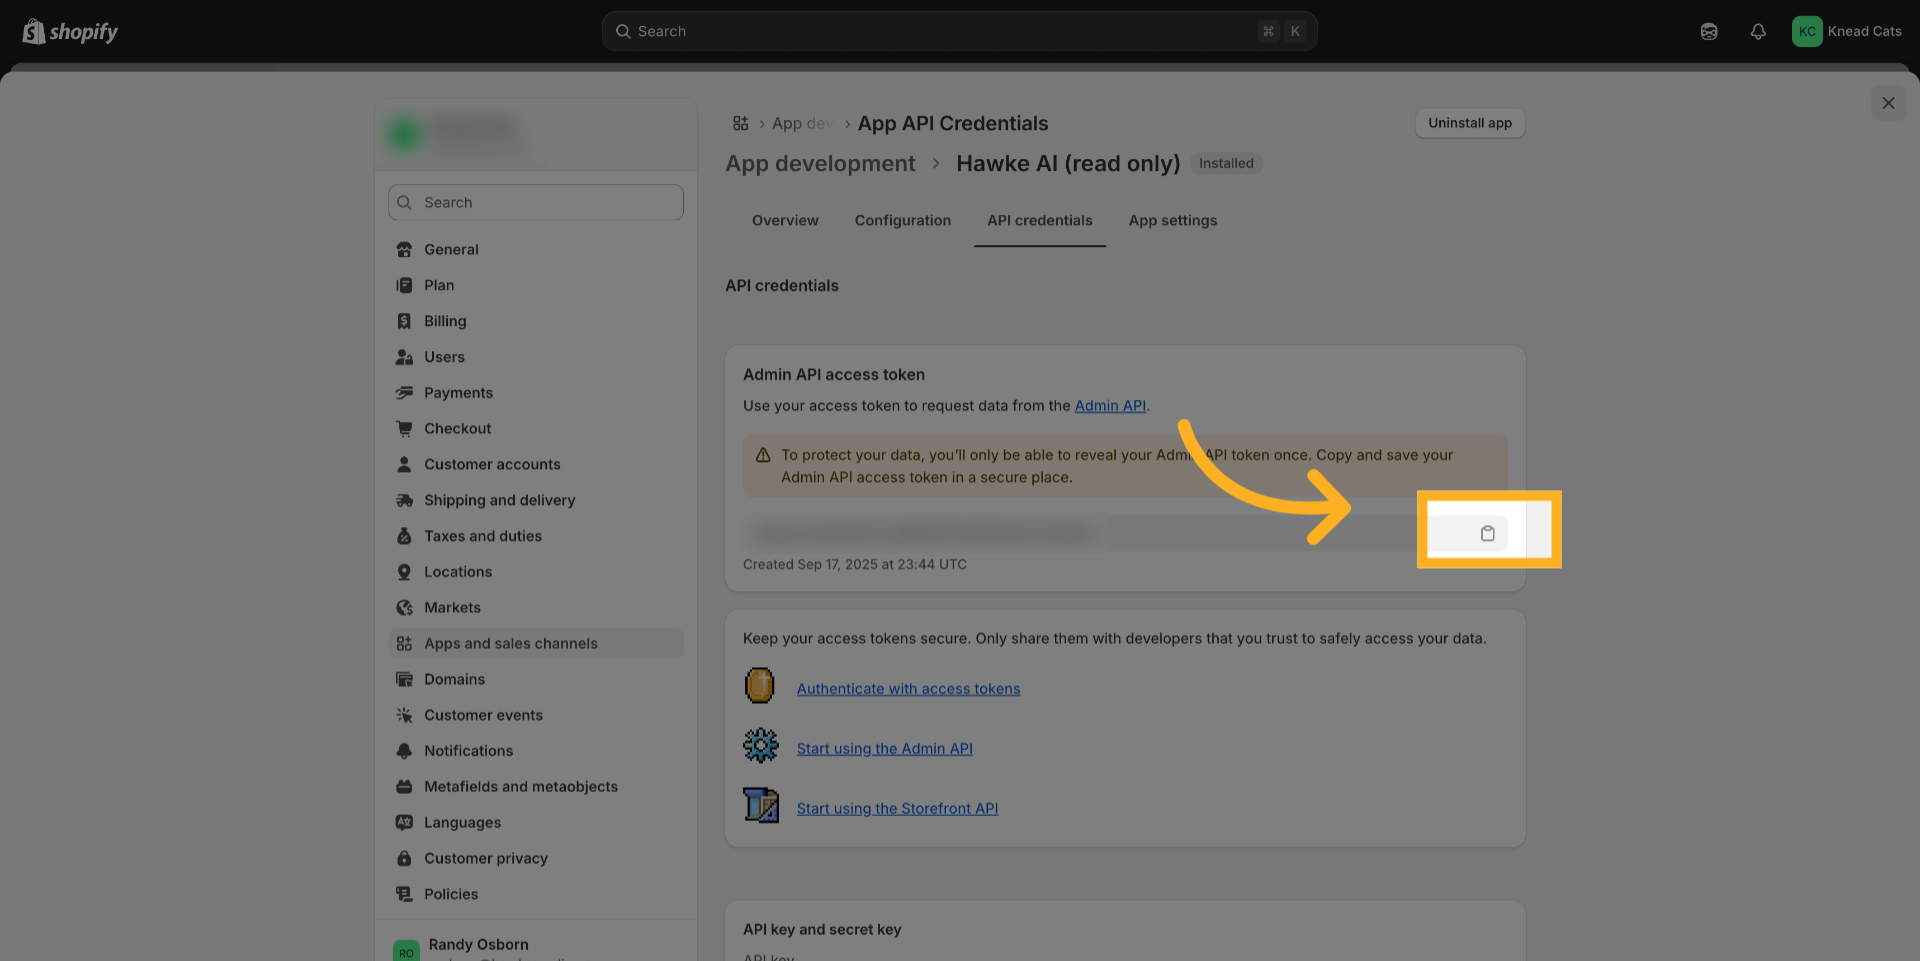
18. Click “Reveal token once”
Click “Reveal token once” to display the API access token. Make sure to copy it immediately as it will only be shown once.
19. Click here
Click here to copy the revealed token and paste it in a secure document as you will need it later.
20. Click here
Scroll down to the API key section. Click here to copy the API key and paste it in the same secure document as the access token.

21. Click “Domains”
Finally, click domains to find your shops domain information needed for integration. It should be in the format of store name.myshopify.com. Be sure to paste this in your document to use later.
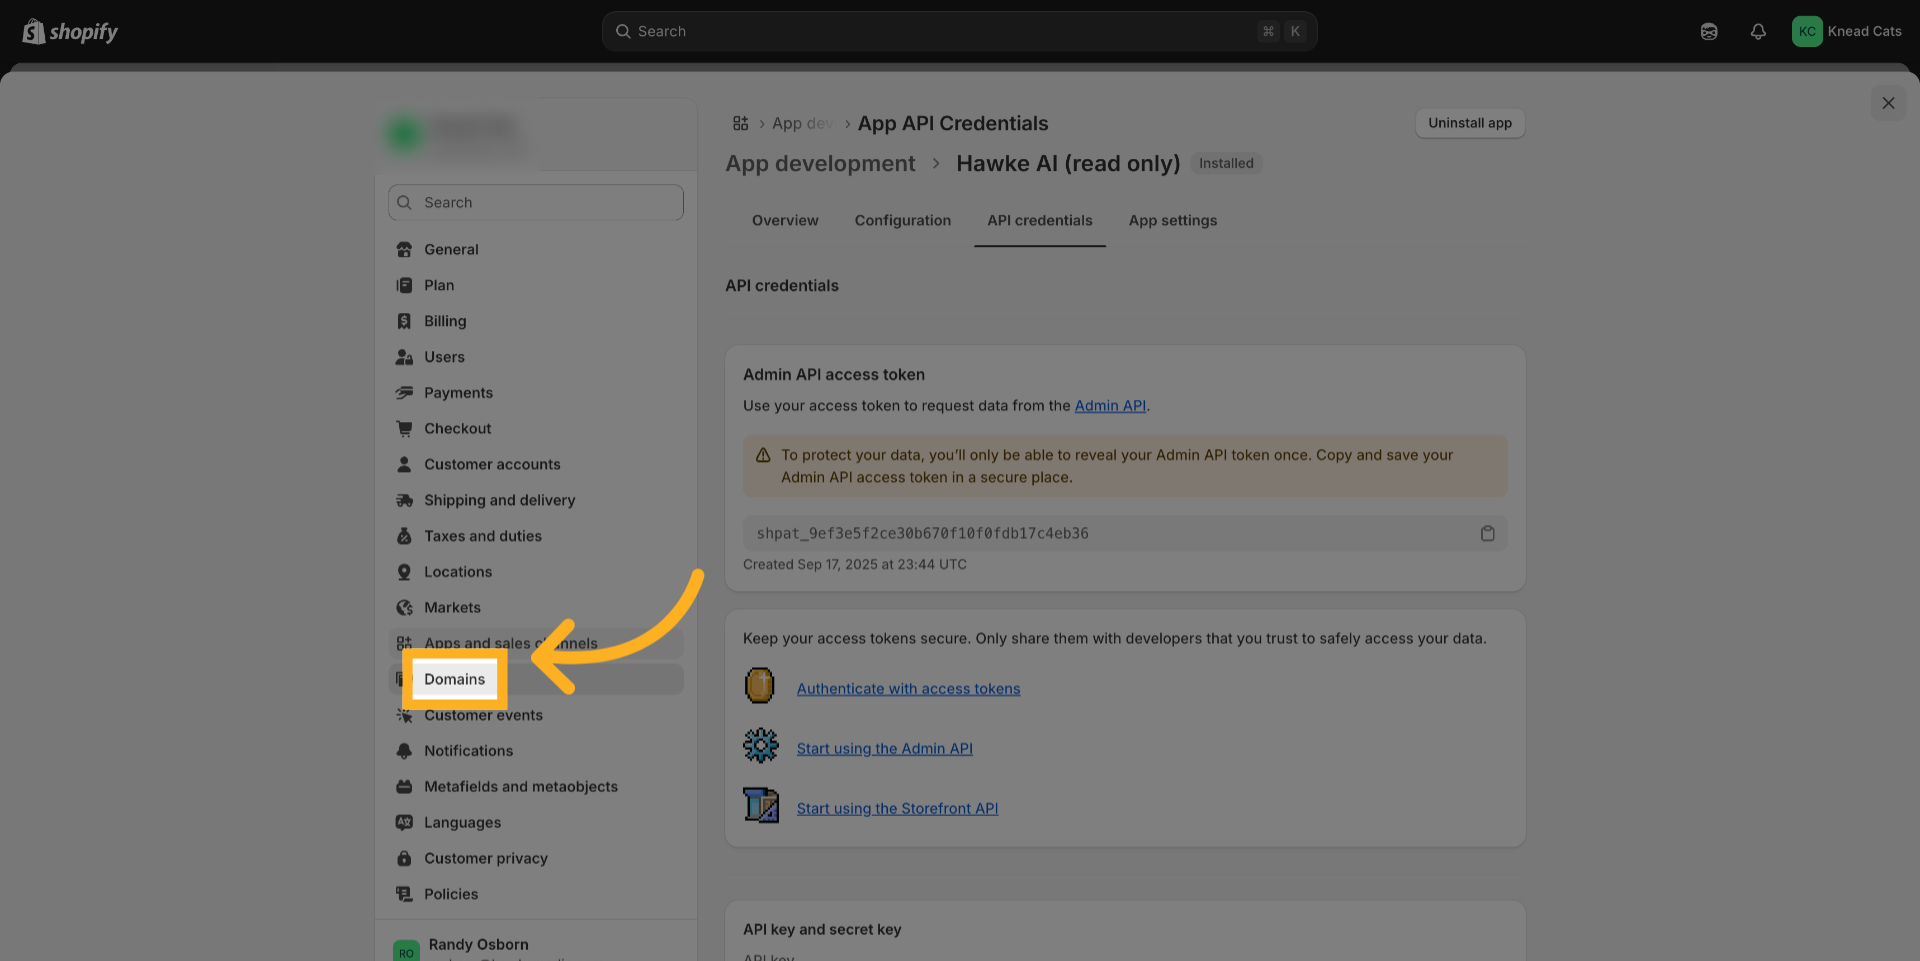
You have successfully configured the Shopify app with the necessary read-only API scopes, installed the app, and obtained the required API credentials. You also located your shop’s domain URL, which is essential for completing the integration in the Hawk AI dashboard. Next, proceed to the Hawk AI platform to finalize the integration process using the credentials and domain information gathered here.
Part 2 Video
Part 2 Steps
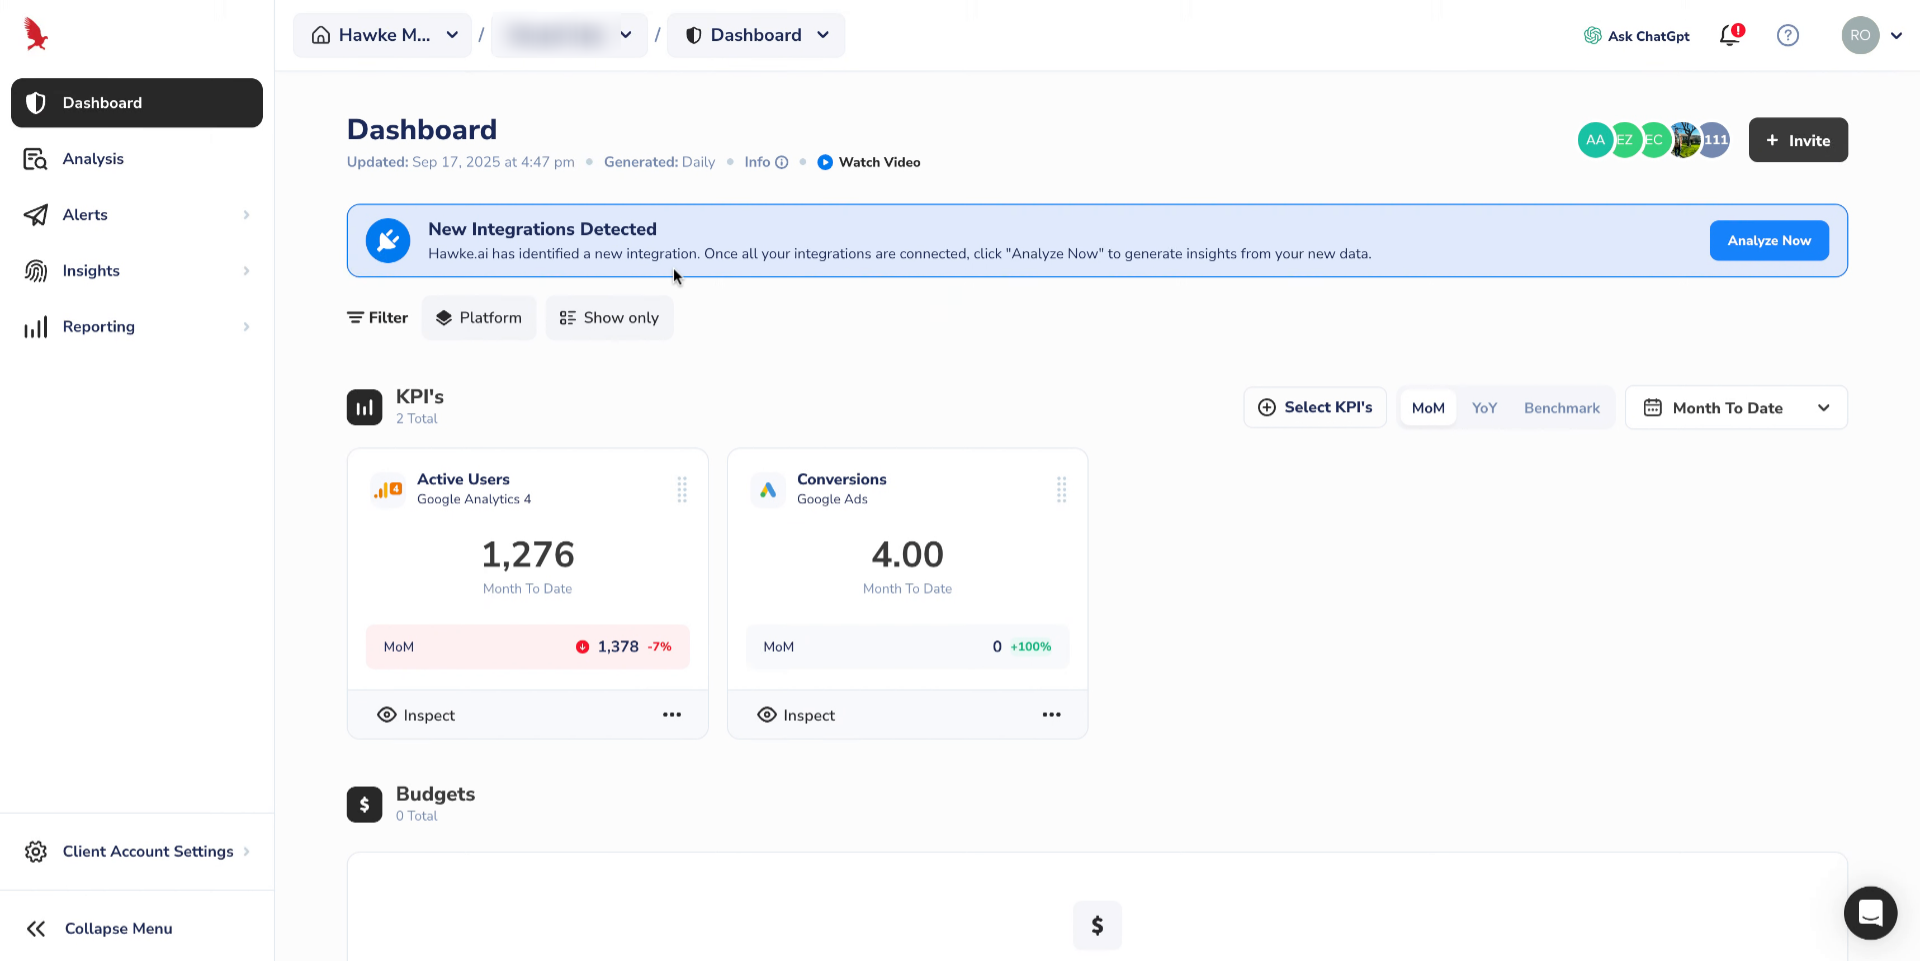
Now, to complete the Shopify integration, go to your Hawke AI dashboard.
Go to app.hawke.ai
1. Introduction
To complete the Shopify integration, go to your Hawke AI dashboard. Client Account Settings. Integrations.
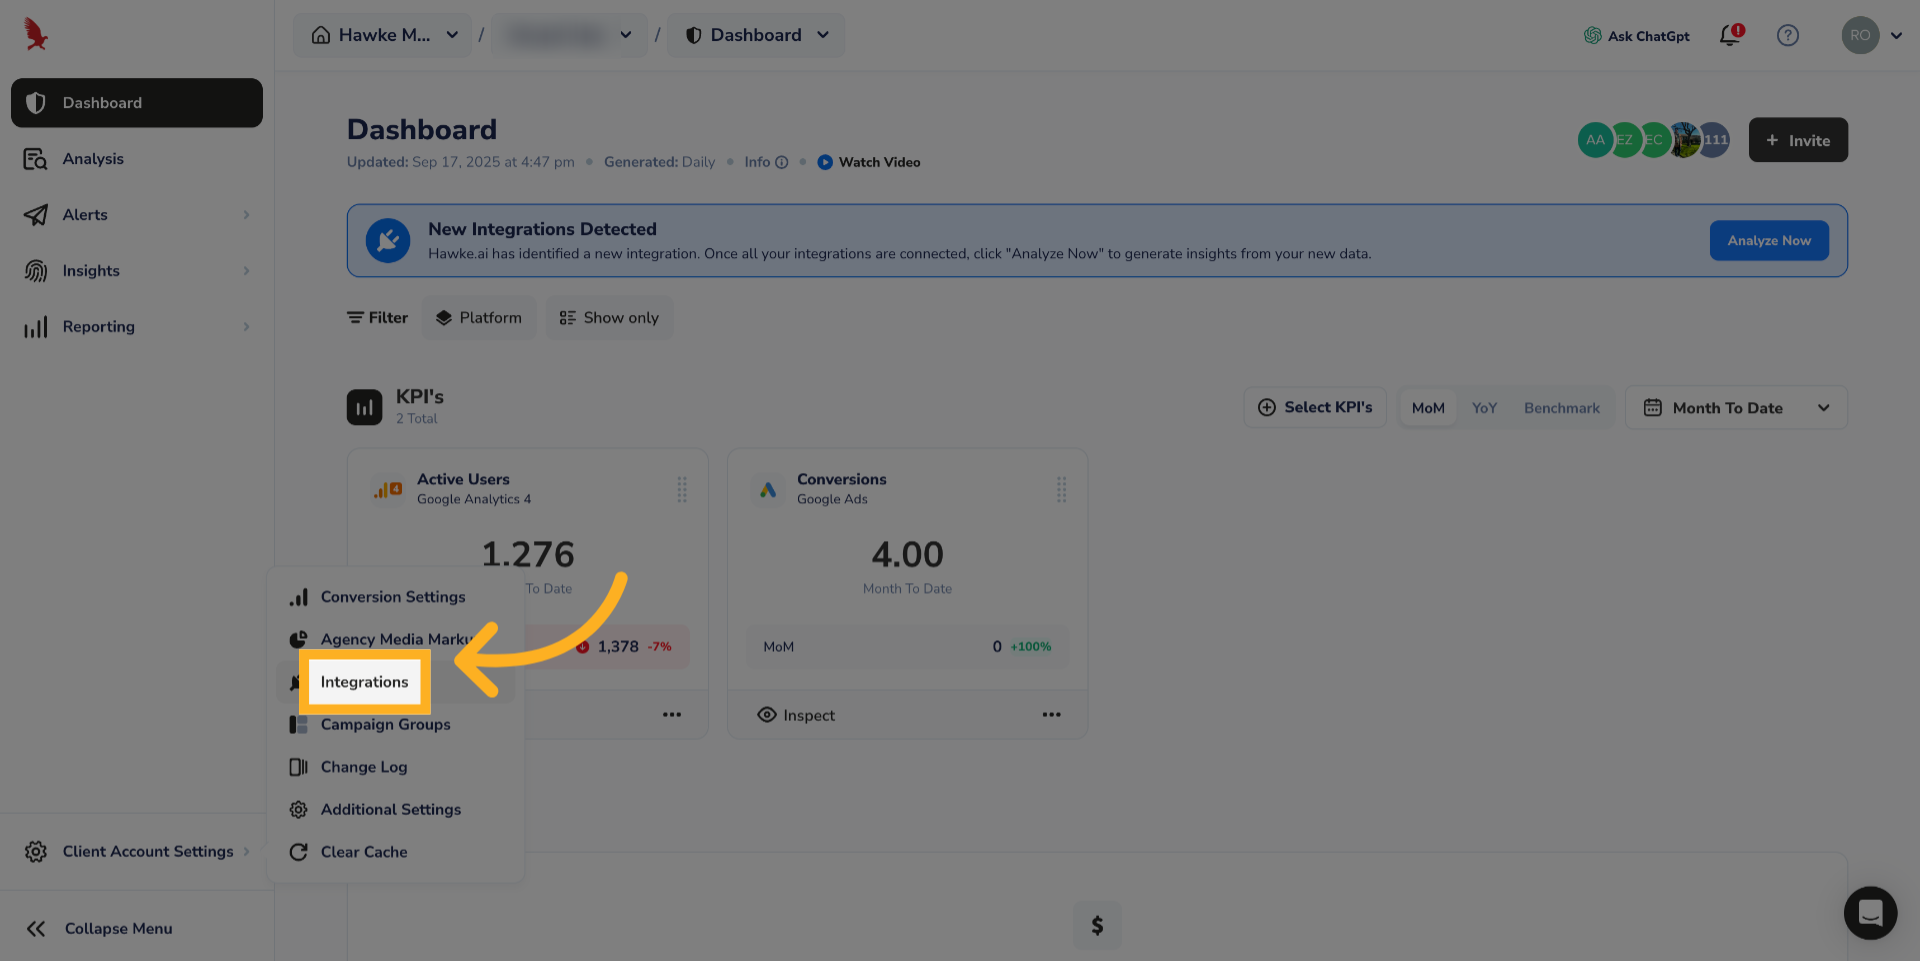
2. Click “Integrations”
Click “Integrations” to see a list of all currently available integration platforms.
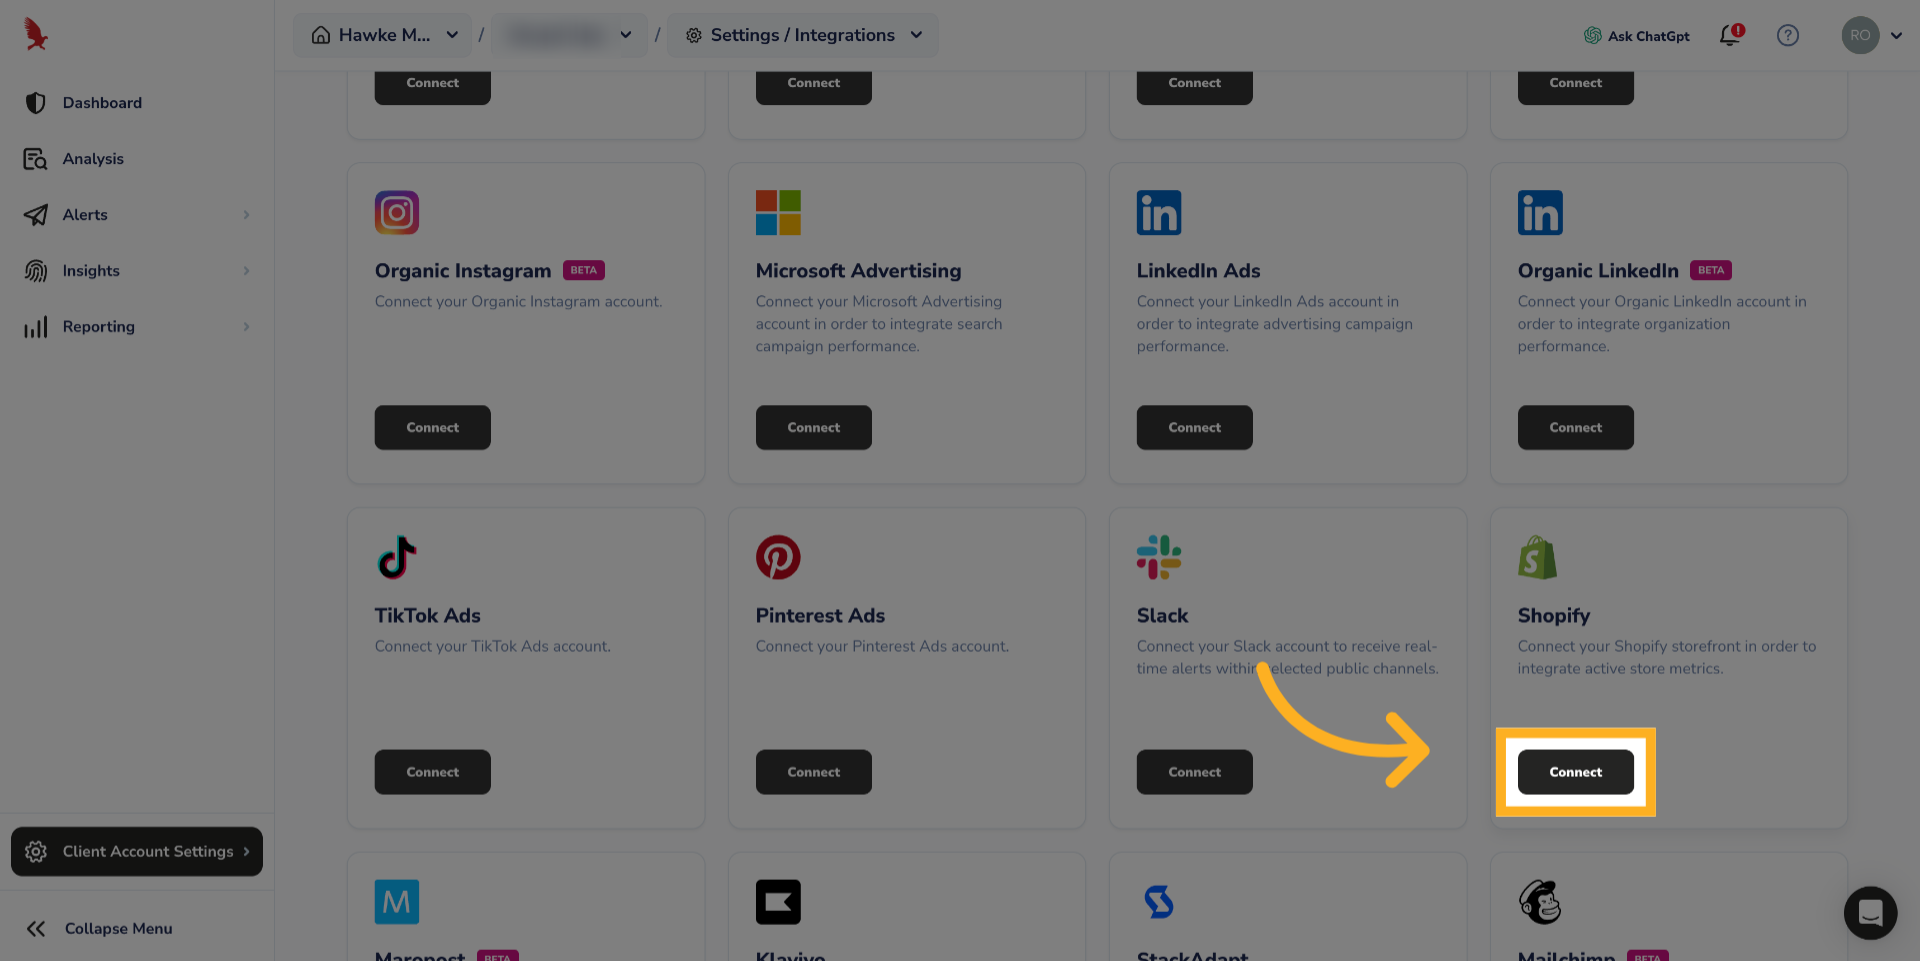
3. Click “Connect”
Scroll through the list of integrations to find Shopify and hit connect.
4. Enter Shop Name
Click “Shop Name” and enter or copy and paste your myshopify.com name.

5. Enter API Key
Then click “API Key” and enter or copy and paste your API key that you saved in the previous step.

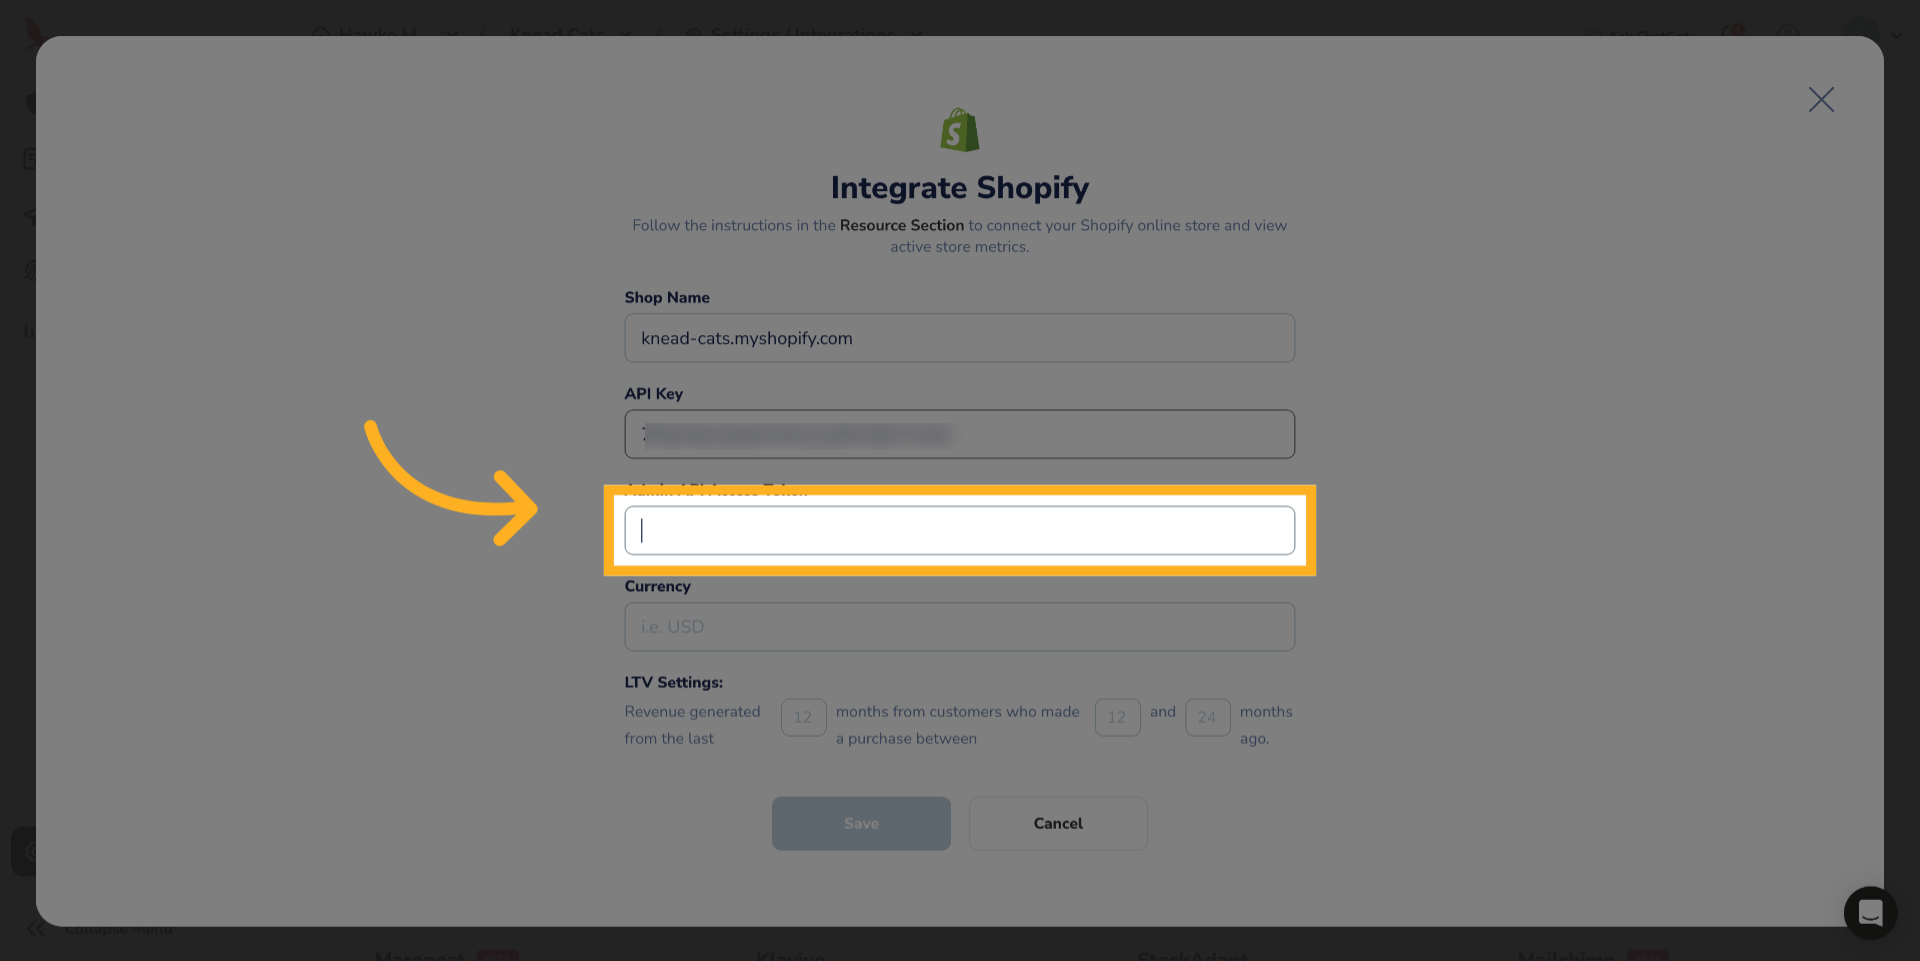
6. Enter Admin API Access Token
Next Click “Admin API Access Token” to enter or copy and paste the previously saved token.
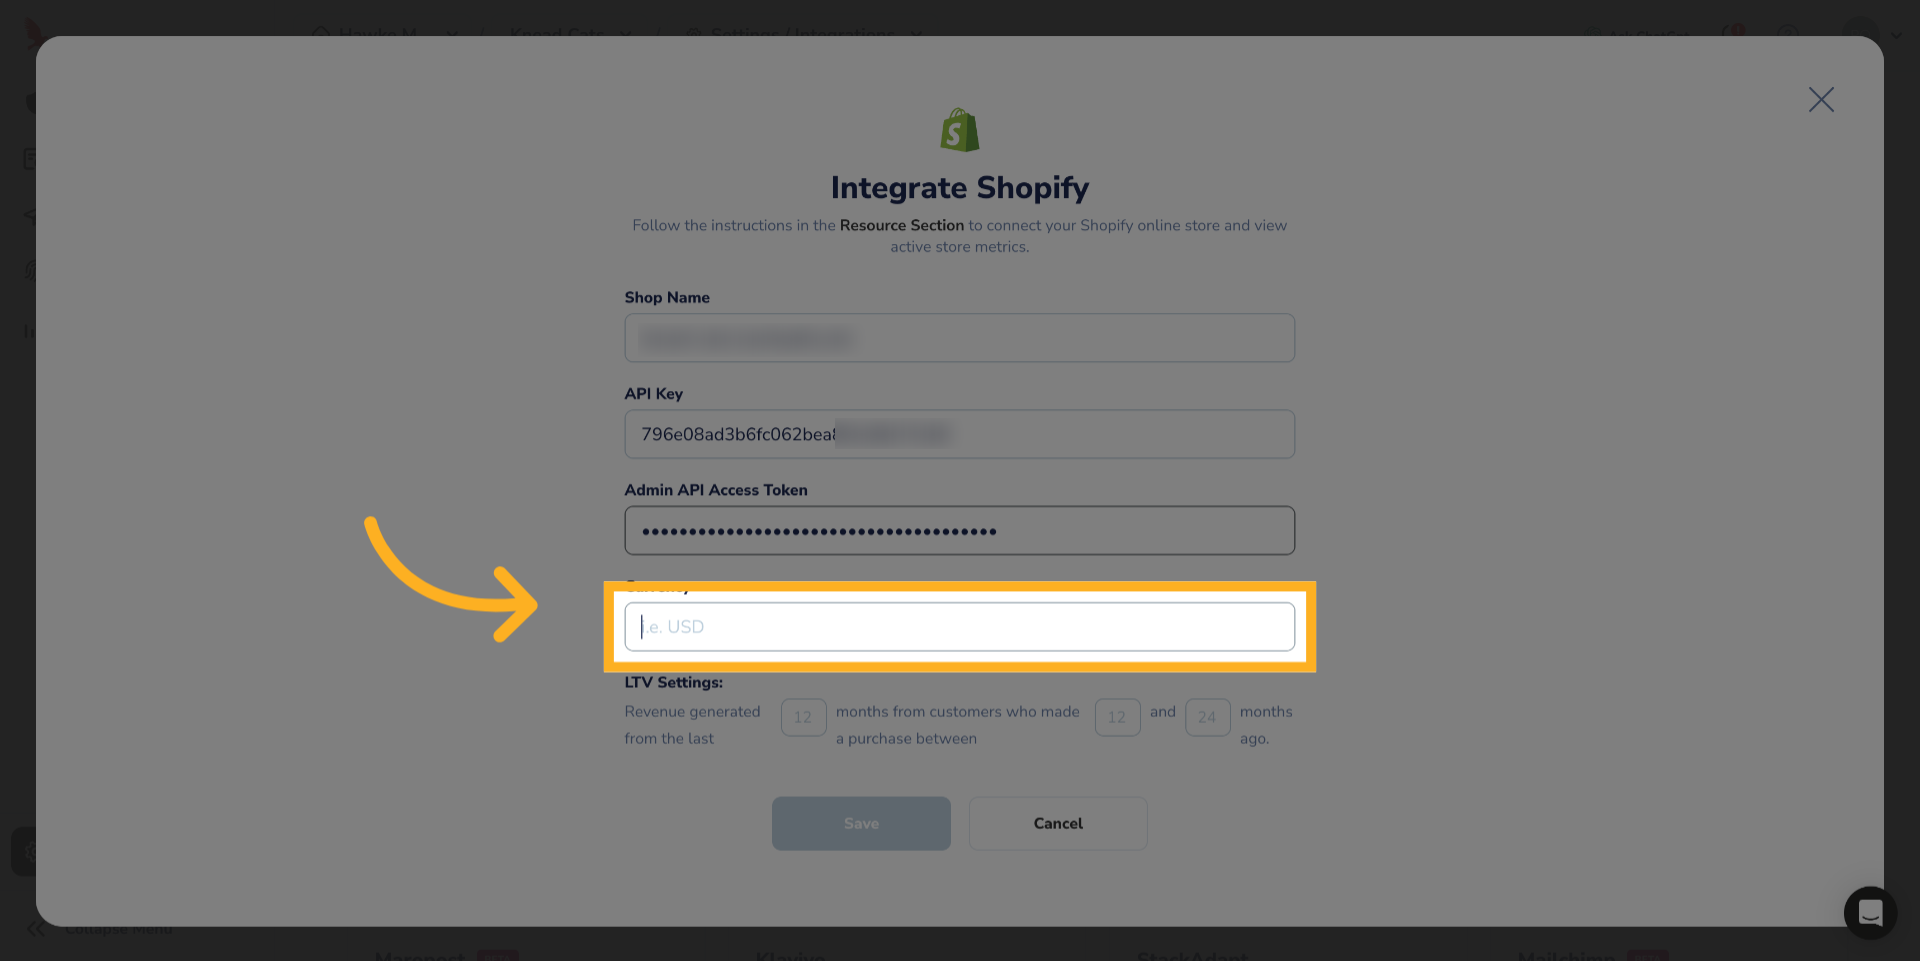
7. Set your Currency
Click “Currency” to set your currency.
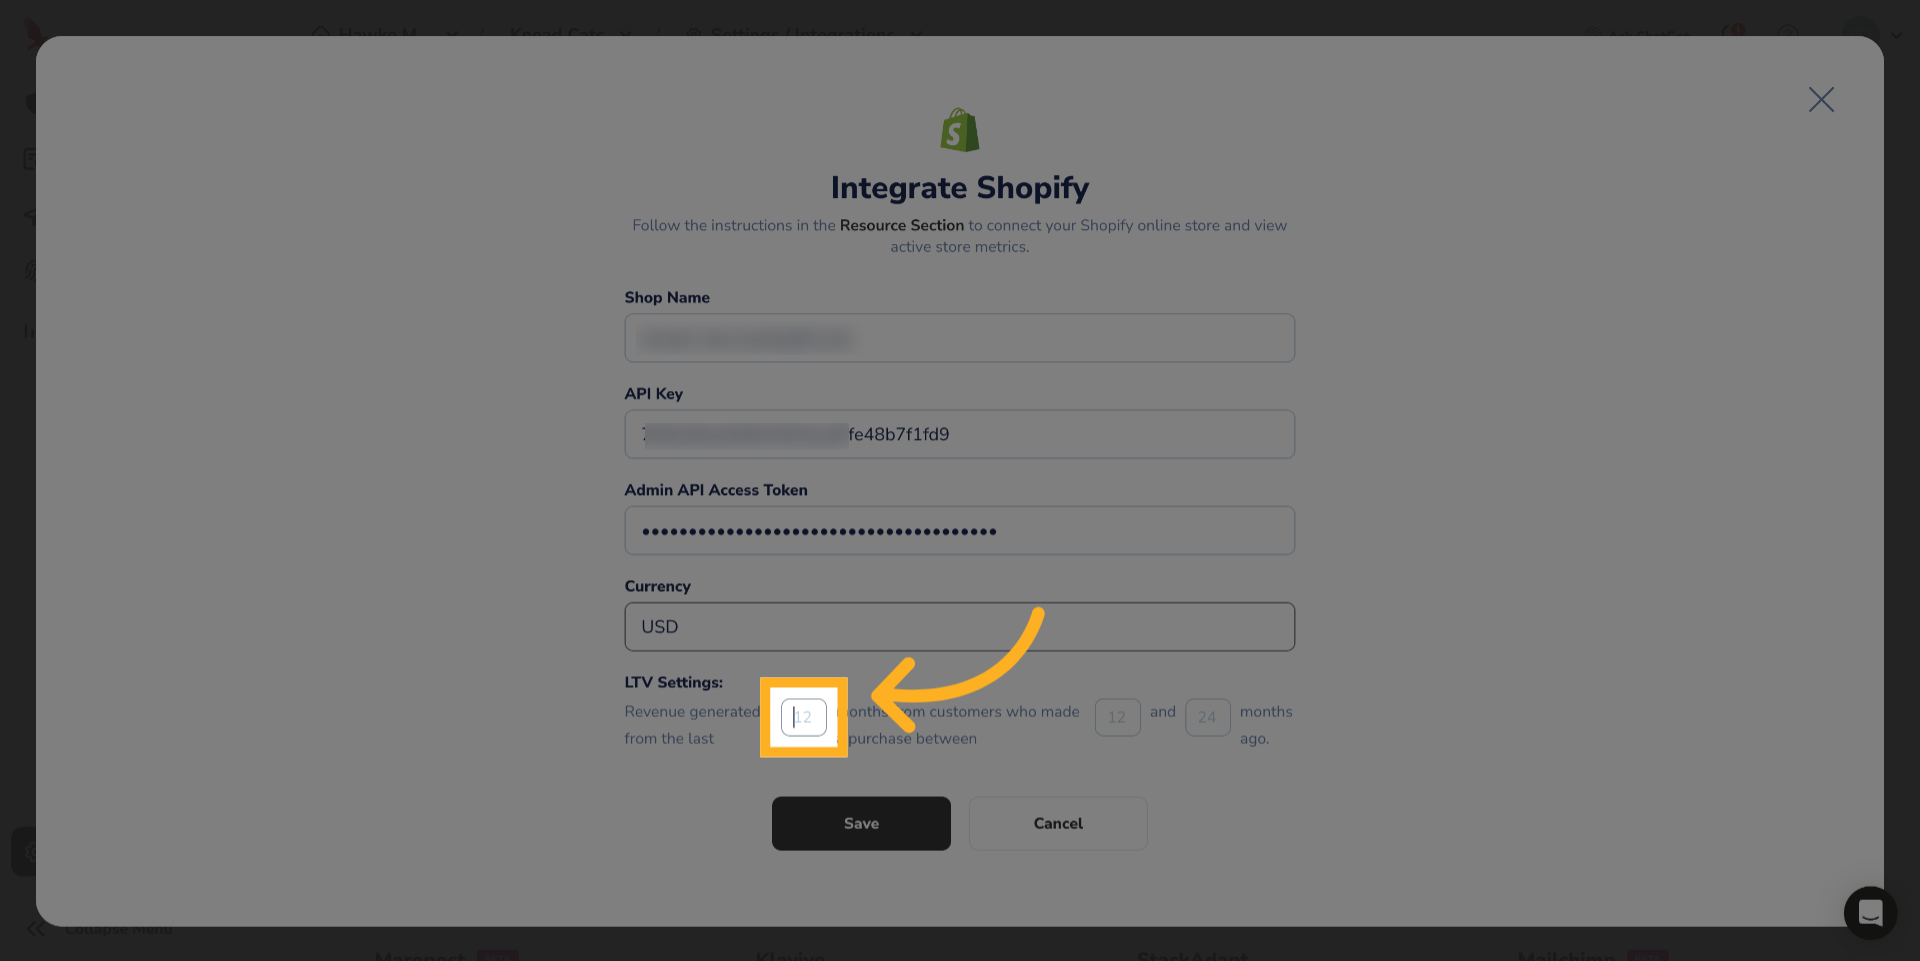
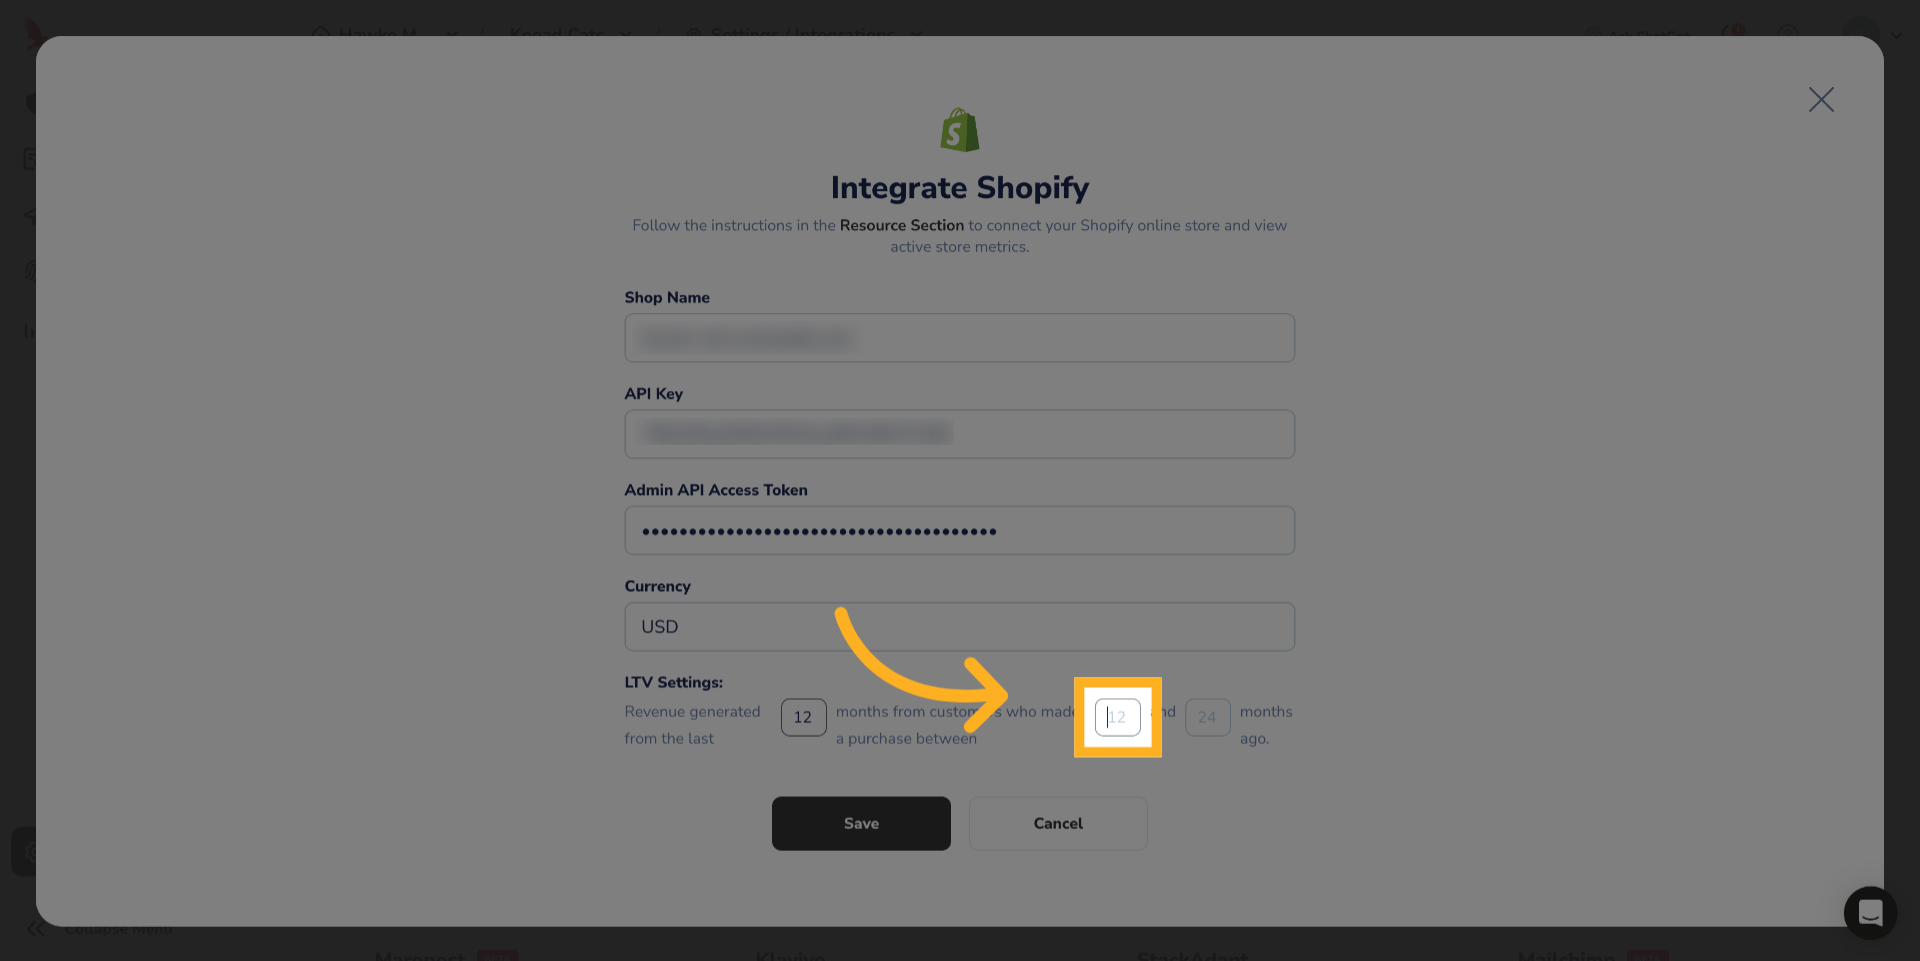
8. LTV Settings
For Lifetime Value settings, Click here to set the revenue period start. We recommend starting with 12 months prior.
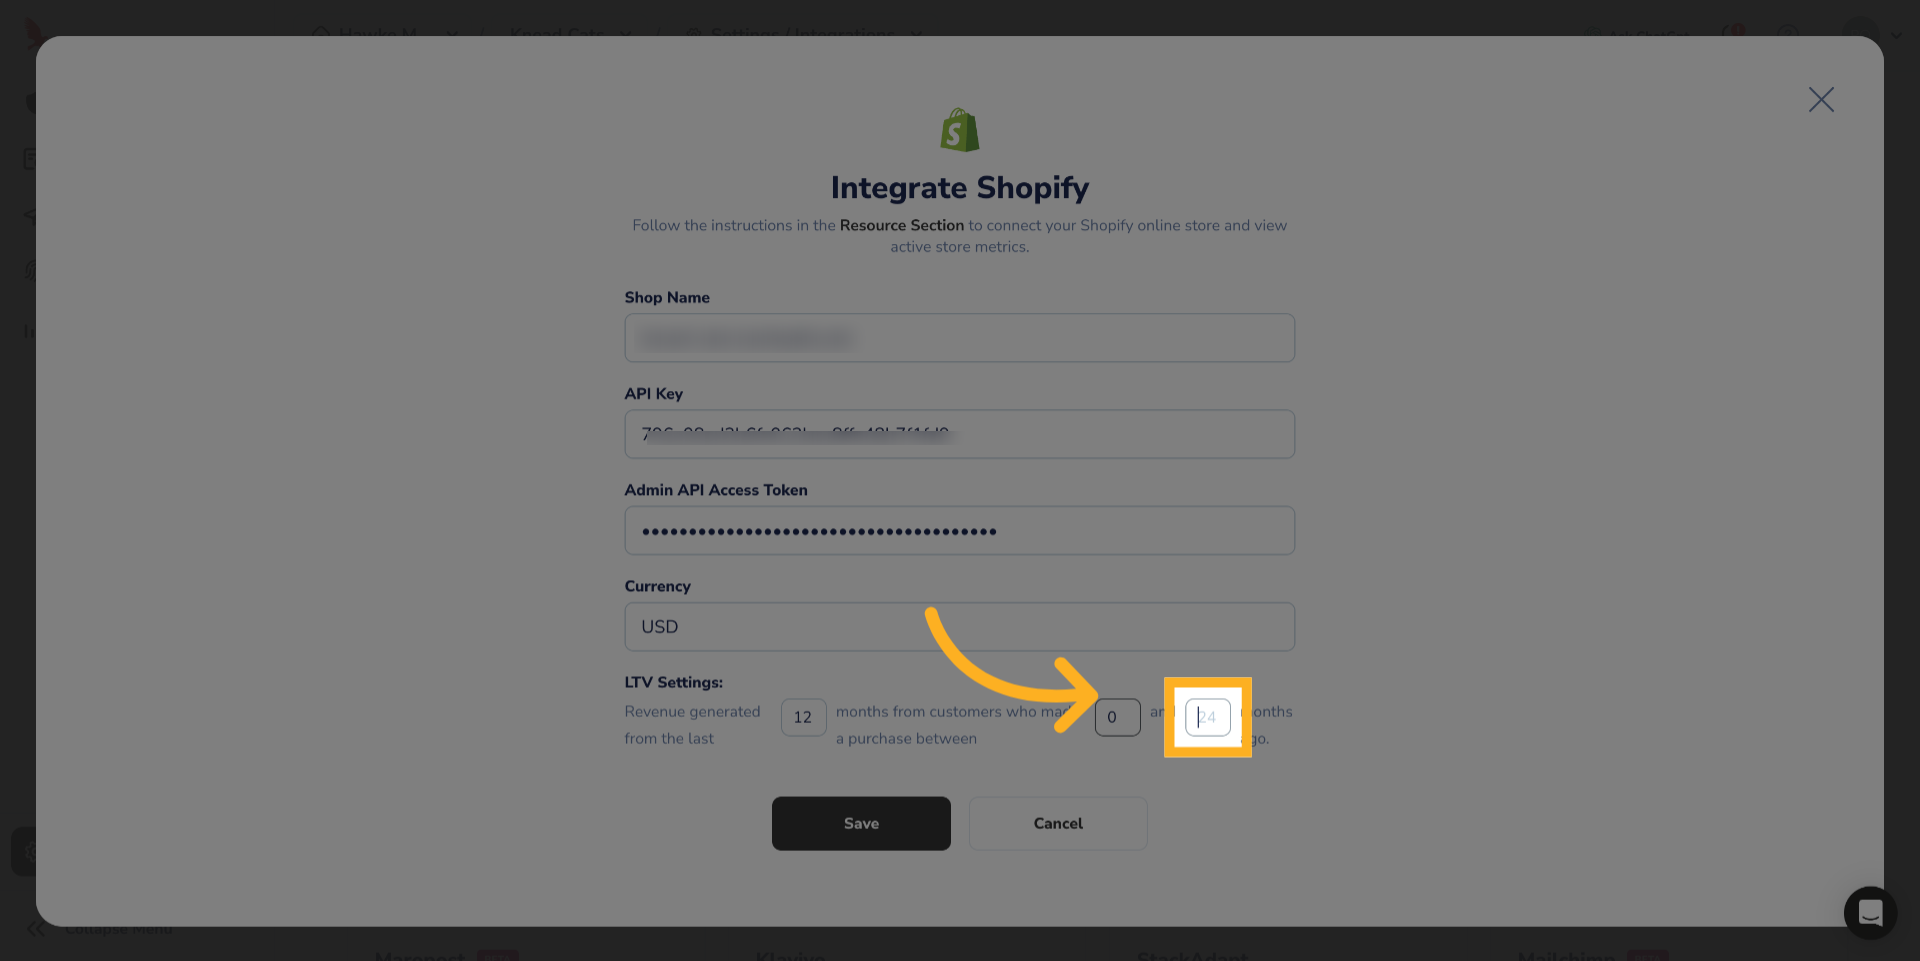
9. LTV Settings
Here you can enter 0 to include all purchases up to the current month.
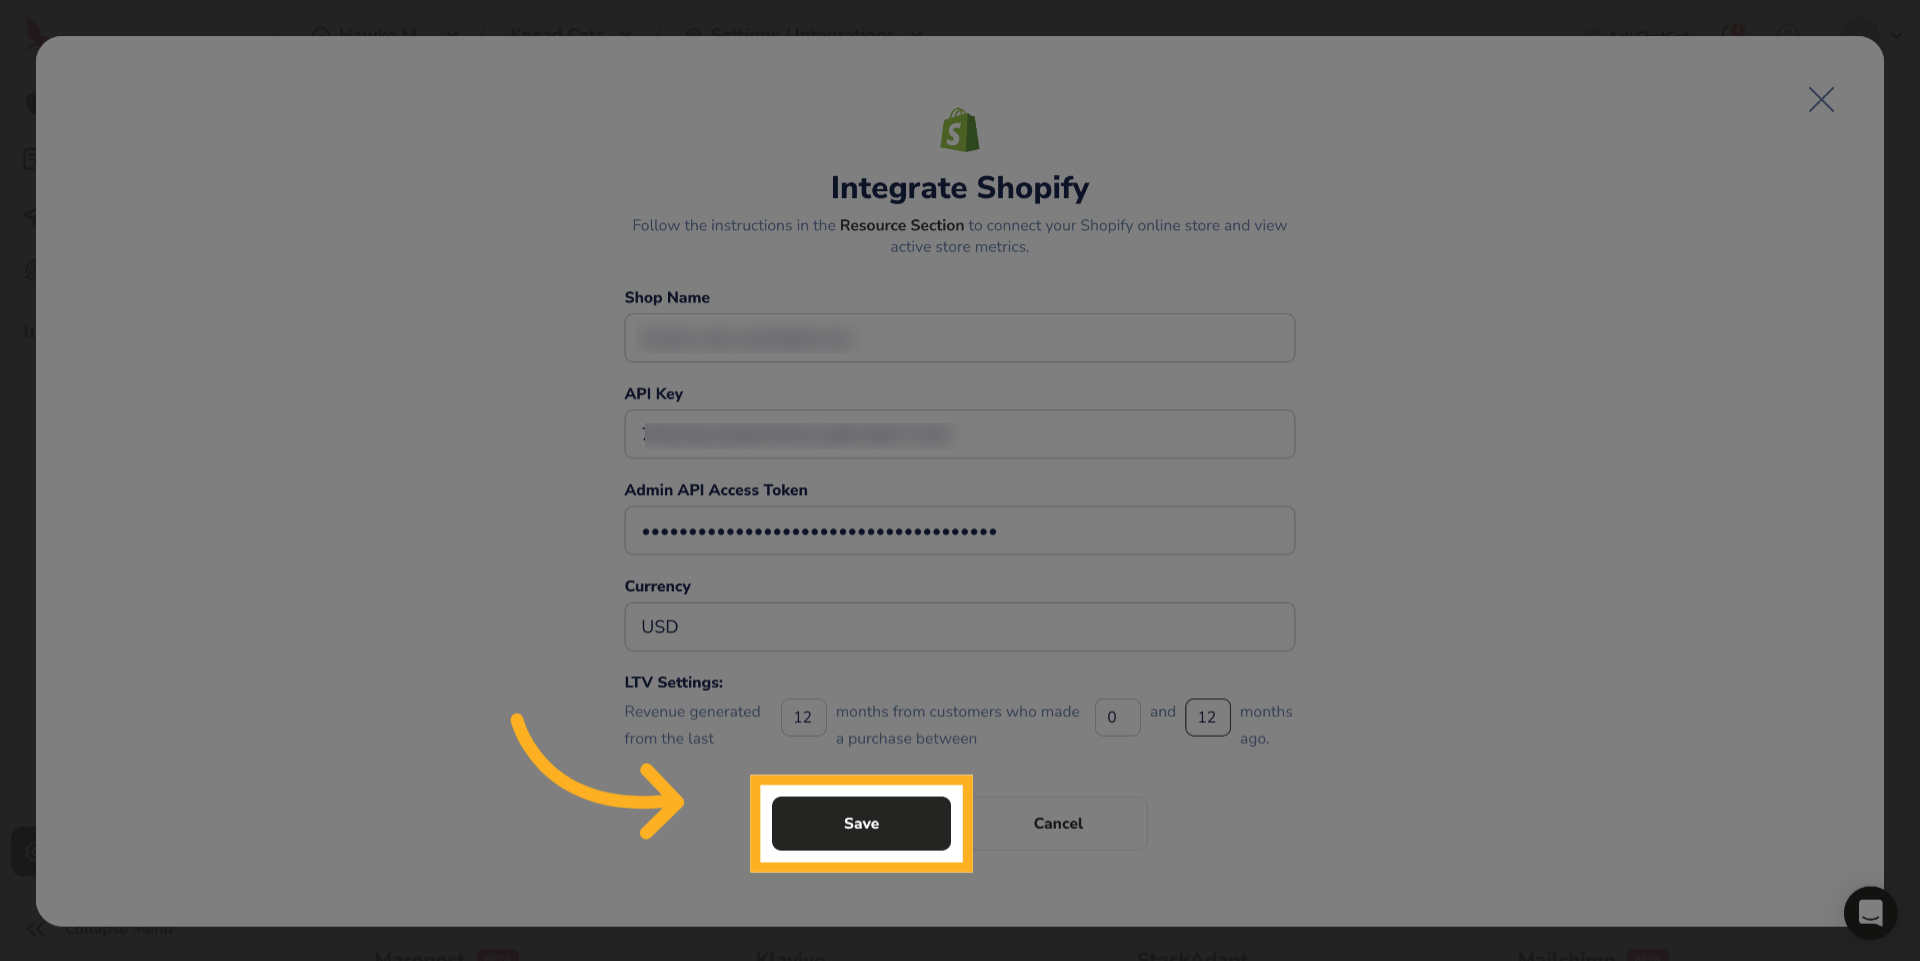
10. LTV Settings
Here you can enter 12 for a comparison range. These are general starting numbers and can be changed easily at any time after the integration
11. Click “Save”
Finally, Click “Save” to save your settings.
12. Verify Shopify Settings
To verify that a connection has been made, go to reporting and thenclick on Shopify. You should see your data reflected there, confirming the integration is complete.

We hope your Shopify integration went smoothly, but if you have any questions, please reach out to the Hawke AI team for support. Thank you.
We use cookies to collect data to improve your experience. By continuing, you agree to our Cookie Policy.